
Create a Trip
Updated 2 months ago
.
Create a Trip
Creating a trip gives you a fundraising workspace for one destination, event, or team journey. The trip starts with its own goal, slug, dates, and status, then you build out participants, tasks, budgets, and public pages from there.
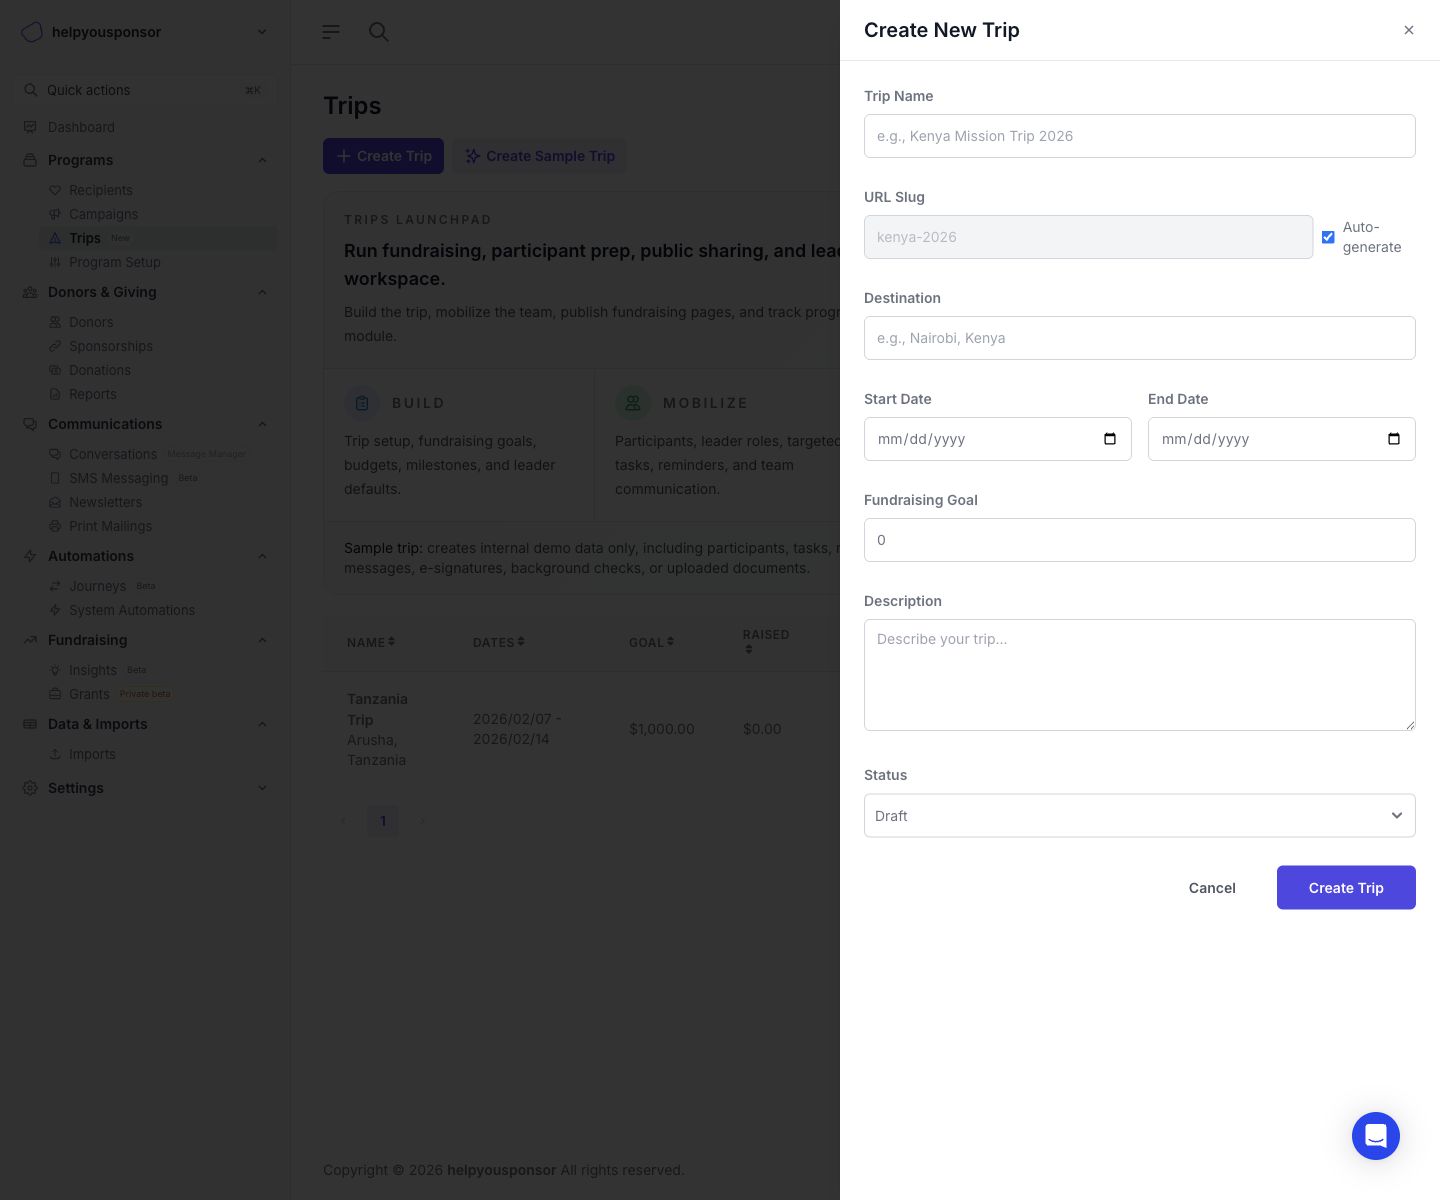
Screenshot placeholder: Create Trip drawer showing the trip creation form
Open the form
From the Trips Table, click Create Trip.
Trip form fields
Trip Name
Enter the main name for the trip. This appears in the trips list, trip details, participant dashboard, and public trip page.
URL Slug
This controls the public trip URL.
Leave Auto-generate enabled to build the slug from the trip name.
Turn Auto-generate off if you want to type a custom slug.
Slugs can use lowercase letters, numbers, and hyphens.
Destination
Add the city, region, or country for quick context in the admin and public views.
Start Date and End Date
Use these fields when you want the trip timeline to appear in the trip details and public page.
Fundraising Goal
Set the overall fundraising target for the trip. The goal drives progress bars throughout the Trips platform.
Description
Add a summary of the trip's purpose, audience, or impact. This content is shown in Trip Details and on the public trip page.
Status
Choose the current trip state:
Draft: The trip is still being prepared.
Active: The trip is live for participant and public workflows.
Completed: The trip has ended.
Archived: The trip is kept for reference.
Cancelled: The trip will not move forward.
Most teams start with Draft, finish setup, then switch the trip to Active when they are ready to share it.
What happens when you save
When you create a trip, Gratona also prepares the fundraising foundation behind the scenes:
A trip fund entity is created for trip-level donations.
The trip is attached to the required Trips program binding.
If your account already has a Trips donor form and Trips program settings, Gratona reuses them.
If required Trips bindings do not exist yet, Gratona creates or attaches what the trip needs so the module can work.
Next steps
After saving, open the new trip in Trip Details to:
add participants
review Trip Settings
set up tasks, documents, budgets, and milestones
publish the public trip page