
How do I import recipient photos?
Updated 3 weeks ago
Import recipient photos in bulk from the data import wizard. Name each photo file after a value that identifies the recipient, upload the files, and Gratona matches each photo to the right recipient by its filename.
Before you start
Photos are matched to recipients by filename, so the filenames carry the whole job. Decide which recipient field identifies each photo before you name anything.
A unique field value in every filename. If your recipient form has a studentID field, name each photo with that student's ID value so the system can match the photo to the right profile.
Supported files. JPG, JPEG, PNG, and GIF images. Each file can be up to 10 MB.
Unique filenames. Two files in the same upload cannot use the same filename, even if they are in different folders.
The upload screen shows the total batch size limit in use for your account. If your whole set of photos exceeds it, upload them in smaller batches.
Open the import wizard
Start the import from Data & Imports, or from the program the recipients belong to.
In the sidebar, open Data & Imports and click Imports, or go directly to
/app/imports/data/wizard.Select the program whose recipients you are importing photos for.
You can also open the wizard from a program: go to Programs, click the three-dot menu on the program card, and select Import. The program is then pre-selected.
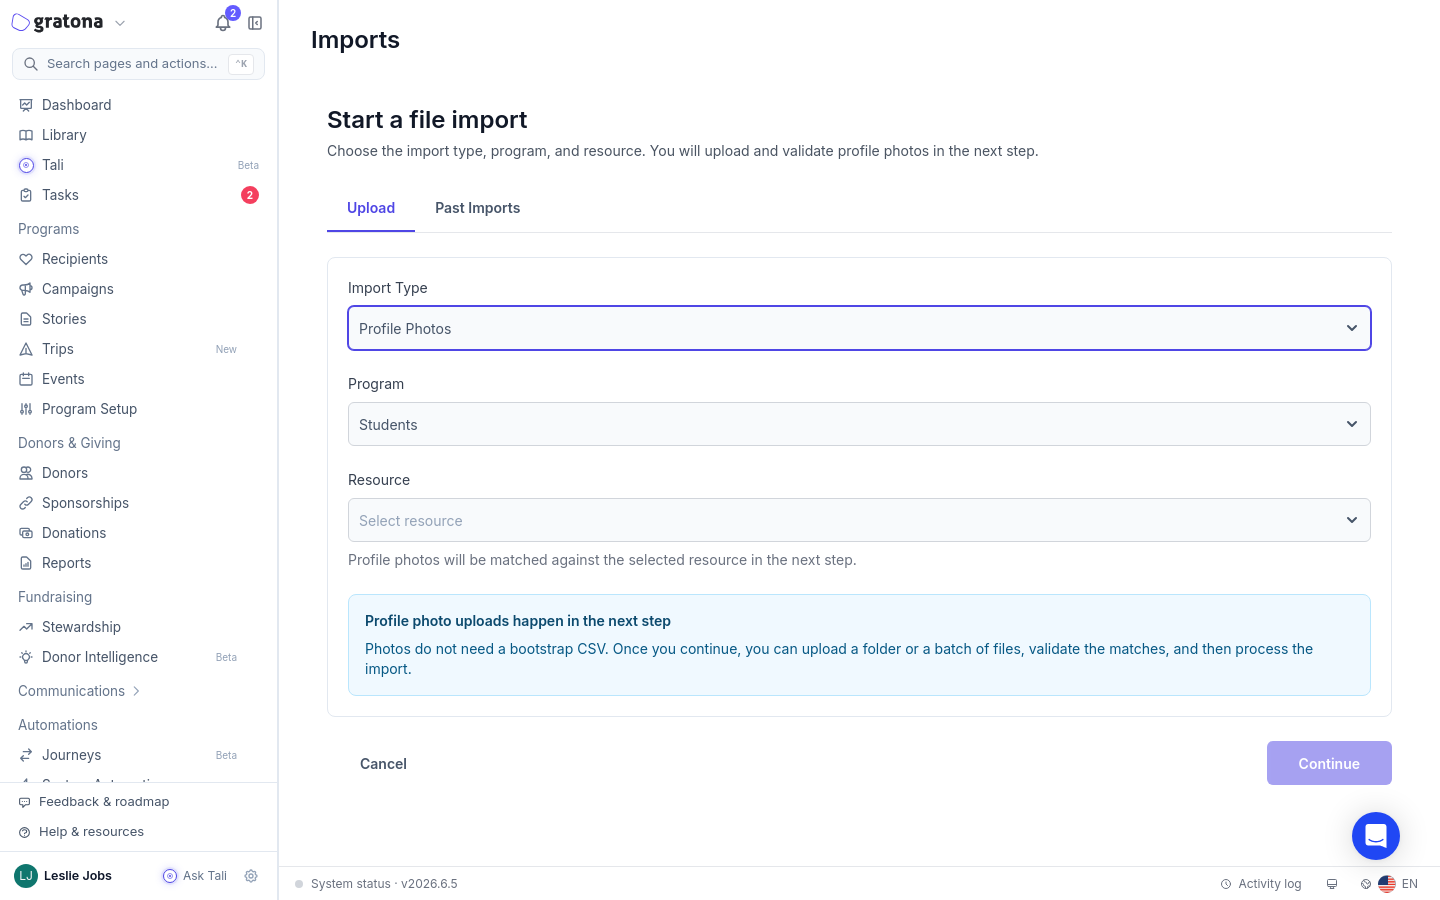
Set up the photo import
The settings tell Gratona how to match filenames to recipients and whether each photo becomes the recipient's profile photo.
Set Import Type to Profile Photos.
Set Resource to Recipients.
Under Photo Import Settings, choose the Unique Field to Consider. Pick Entity ID under System Fields to match on the recipient's system ID, or pick a recipient form field, such as a student ID field.
Choose whether to Make photos Profile photos: select Yes if each photo should become the recipient's profile photo, or No if it should not.
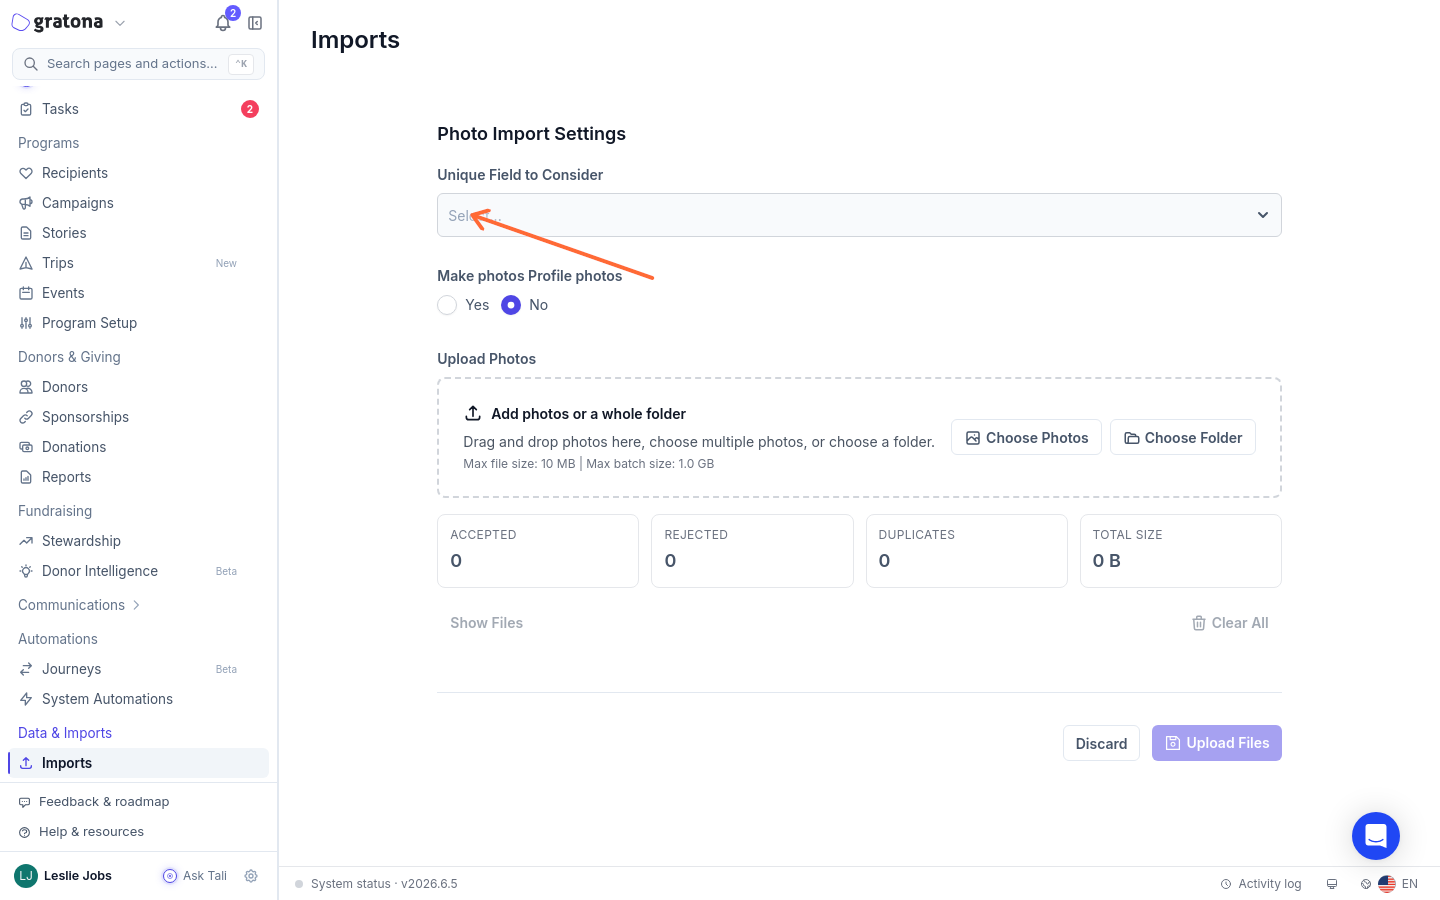
Upload your photos
Add all the photos in one batch, check the summary, then stage the upload.
In the Upload Photos area, drag and drop your photos, click Choose Photos to select multiple files, or click Choose Folder to select a whole folder.
Review the summary: Accepted, Rejected, Duplicates, and Total Size.
Expand Show Files to search the files or remove individual ones. Use Clear All to start over.
Click Upload Files to stage the upload.
If a file is rejected
Each rejected file shows the reason:
Unsupported file type. Only JPG, PNG, and GIF images are allowed.
File exceeds the 10 MB size limit. Compress or resize the image before uploading it again.
Duplicate filename. Another selected file already uses this name. Rename one of the files.
Validate and complete the import
Validation checks each staged photo before anything is imported, so unmatched files never reach a recipient.
Once the upload is complete, click Begin Validation. If some files failed to stage, the button reads Retry Failed Files instead.
Wait on the Photo Import Validation screen while the files are processed.
Review the results. Validation Completed shows how many files were successful, with warning and error counts when they exist. File-level errors are listed under Validation Errors with the filename.
If a filename matches two recipients equally well, it is treated as ambiguous and matches no recipient. Rename the file with a more specific value and upload it again.
Click Proceed with Import to finish the import.
How filenames are matched
Knowing how matching works helps you name files that match the first time.
Matching is case-insensitive and ignores the file extension.
For most fields, punctuation and spacing in the filename are ignored, so separators around the ID value do not prevent a match.
For email fields, the @ sign, periods, underscores, plus signs, and hyphens are preserved. For username fields, periods, underscores, and hyphens are preserved.
A matched value needs at least three characters. Entity ID values are the exception and can match with fewer.
Common words such as
photo,avatar,headshot,profile, andcopyare ignored when deciding which value a filename contains.
For importing documents and other files, or for a general overview of file imports, see How do I bulk upload files?