
User Management
Updated 2 months ago
.
User Management
User management in Gratona provides comprehensive control over who can access your organization's platform and what they can do. This robust system allows you to maintain security while providing appropriate access levels to team members, volunteers, and administrators.
To navigate to User Management, open the quick actions menu (Cmd+K) and search for Admin & Permissions, or go directly to /admin-options in your browser.
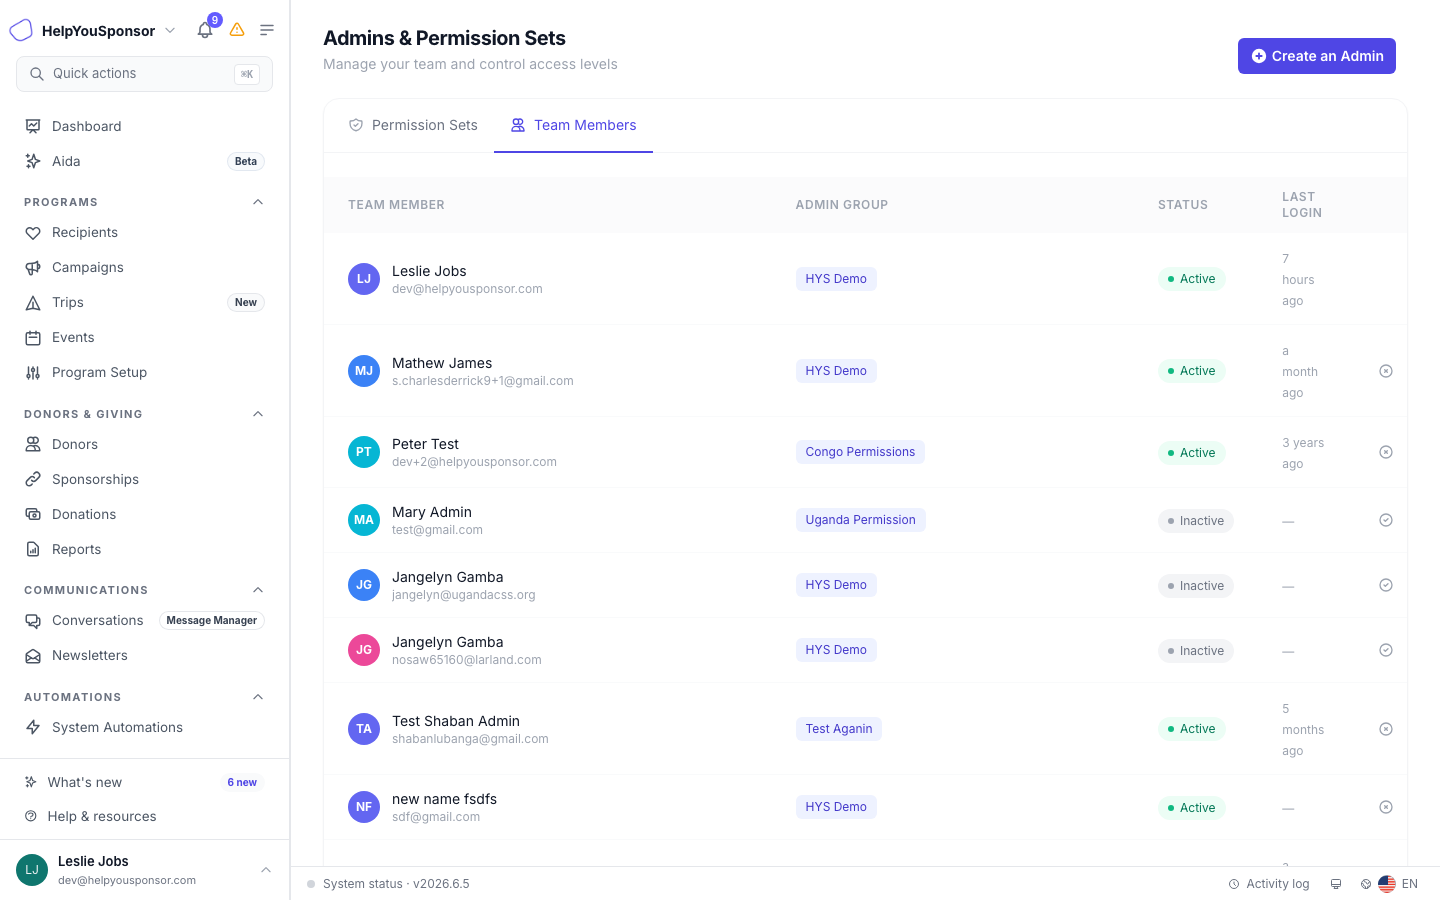
Admin Options — Team Members tab showing the list of admins
This page shows you the permission sets and administrators you have in your account.
From here you can perform actions like;
Creating an Admin
Editing an Admin
Activating or deactivating an Admin
Deleting an Admin
Creating an admin
To create an admin, click the Create button on the Team Members tab. This will open up a drawer with a form to fill in the admin details.
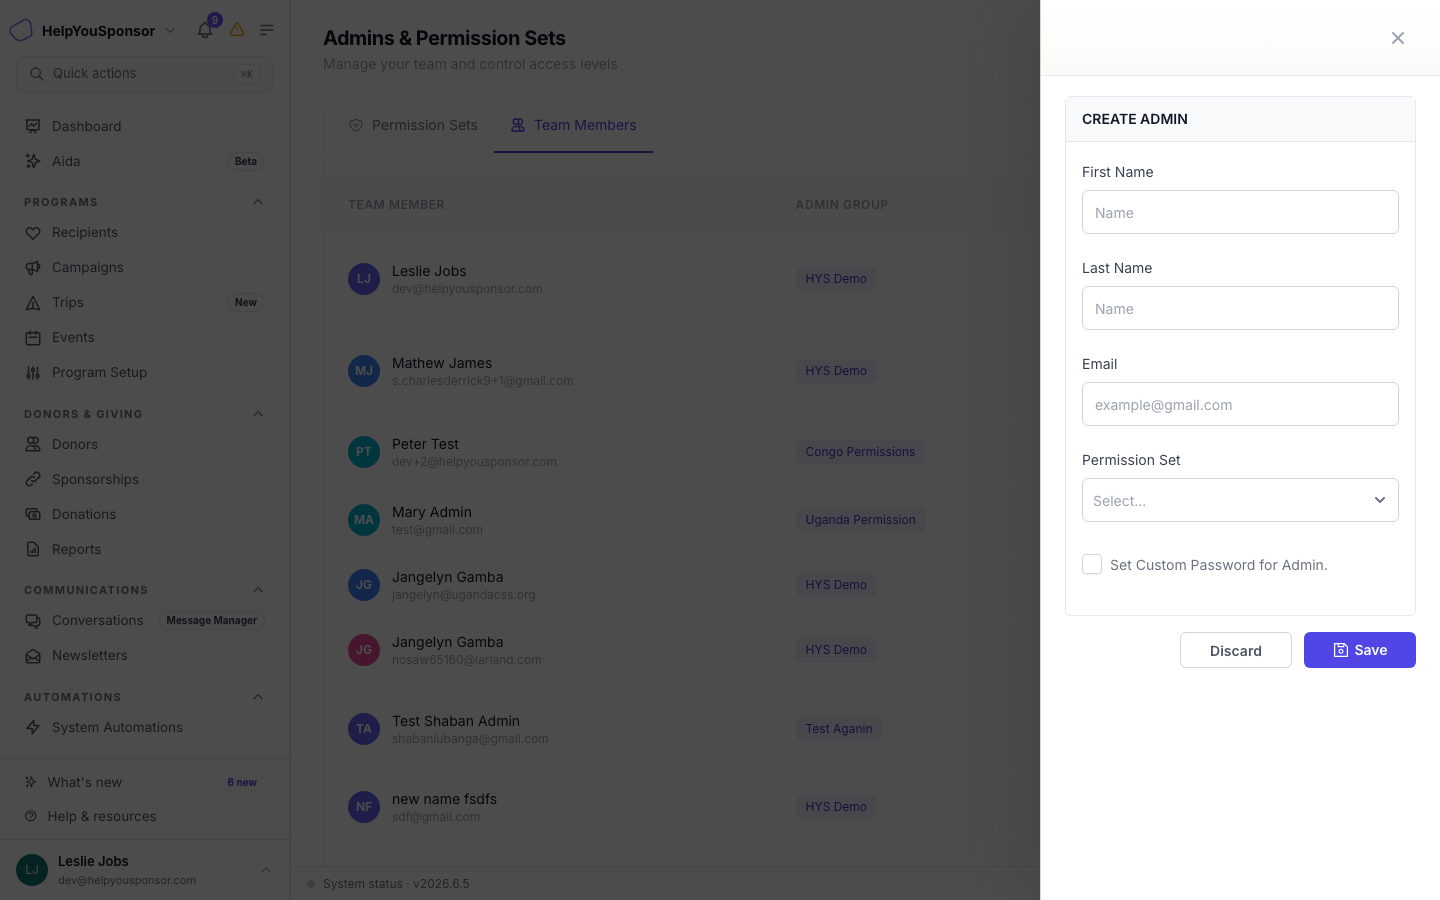
Create Admin drawer with name, email, and permission set fields
The Permission Set listed here will be the permission sets you have in your account. If you do not have a permission set, create one from here.
Editing an Admin
To edit an admin, click on the pencil icon next to the admin in the admins table. This will open up a drawer with the admin's information. After editing the information of your choice, click Save.
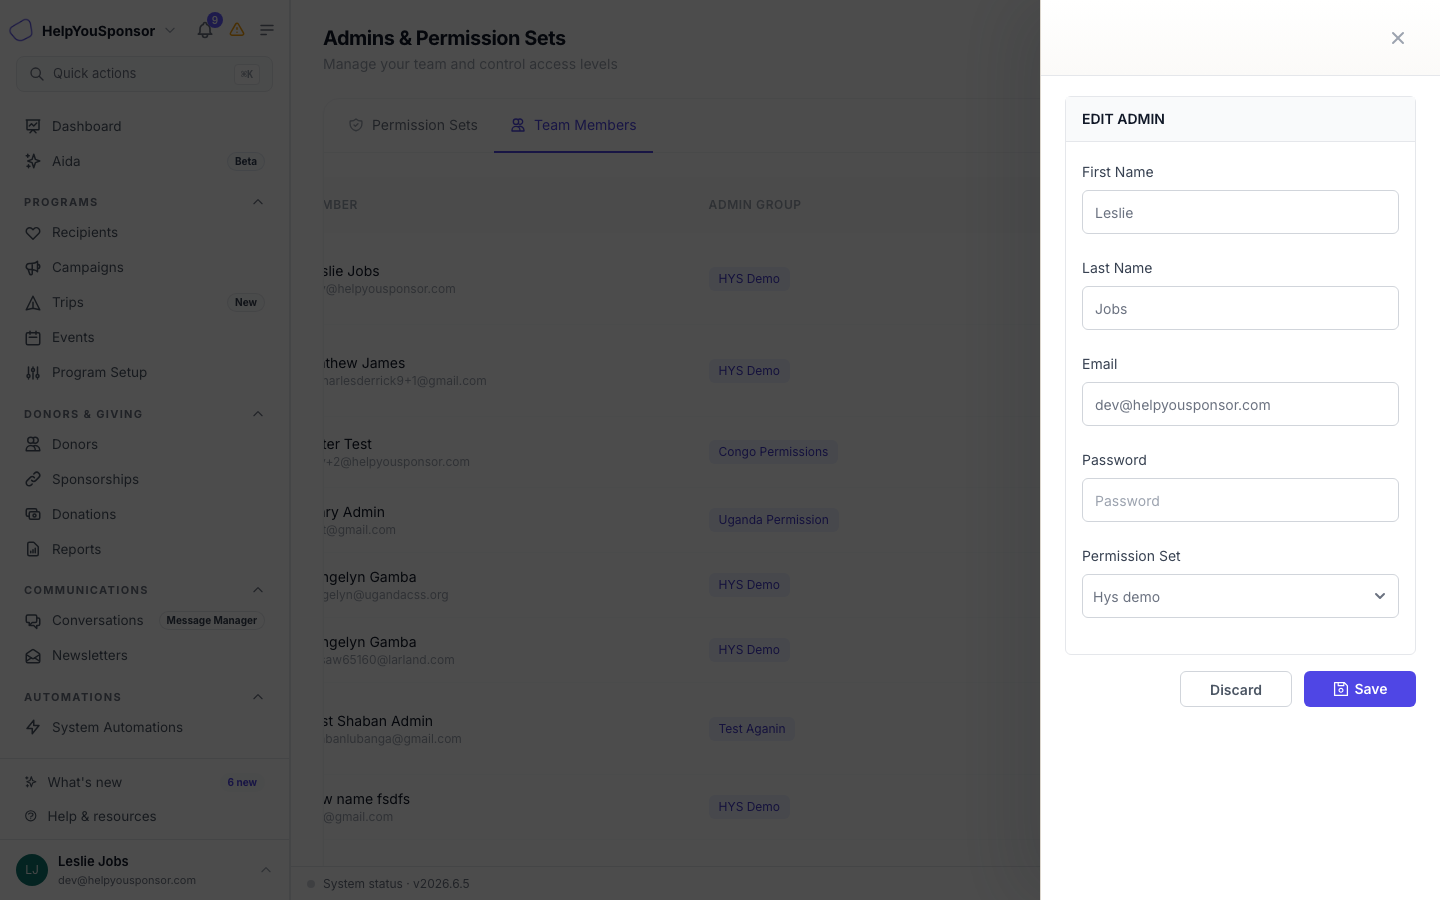
Edit Admin drawer showing a selected admin's details
Activating or Deactivating an Admin
To activate an admin, click the check-circle icon next to the admin in the table. To deactivate an admin, click the cross-circle icon. The status icon toggles based on the admin's current state.
Deleting an Admin
To delete an admin, click on the delete icon in the admins table. This will pop up a dialog to confirm the deletion. Click Confirm if you wish to continue.