
Filter reports by date range
Updated 2 months ago
Use the date range setting in the report builder to control which period of data a report covers. The date range is part of the Sort and range step in the report builder and applies to every source module, including Donations, Sponsorships, Donors, and more.
Set a date range
Open Reports from the sidebar under Donors & Giving.
Select New report to create a report, or open an existing report and select Edit.
In the Sort and range step, choose a date range option:
All time — include all data, regardless of date.
This year — data from the start of the current calendar year through today.
Custom range — set specific start and end dates for the report.
Select Save or Save & run to apply the date range.
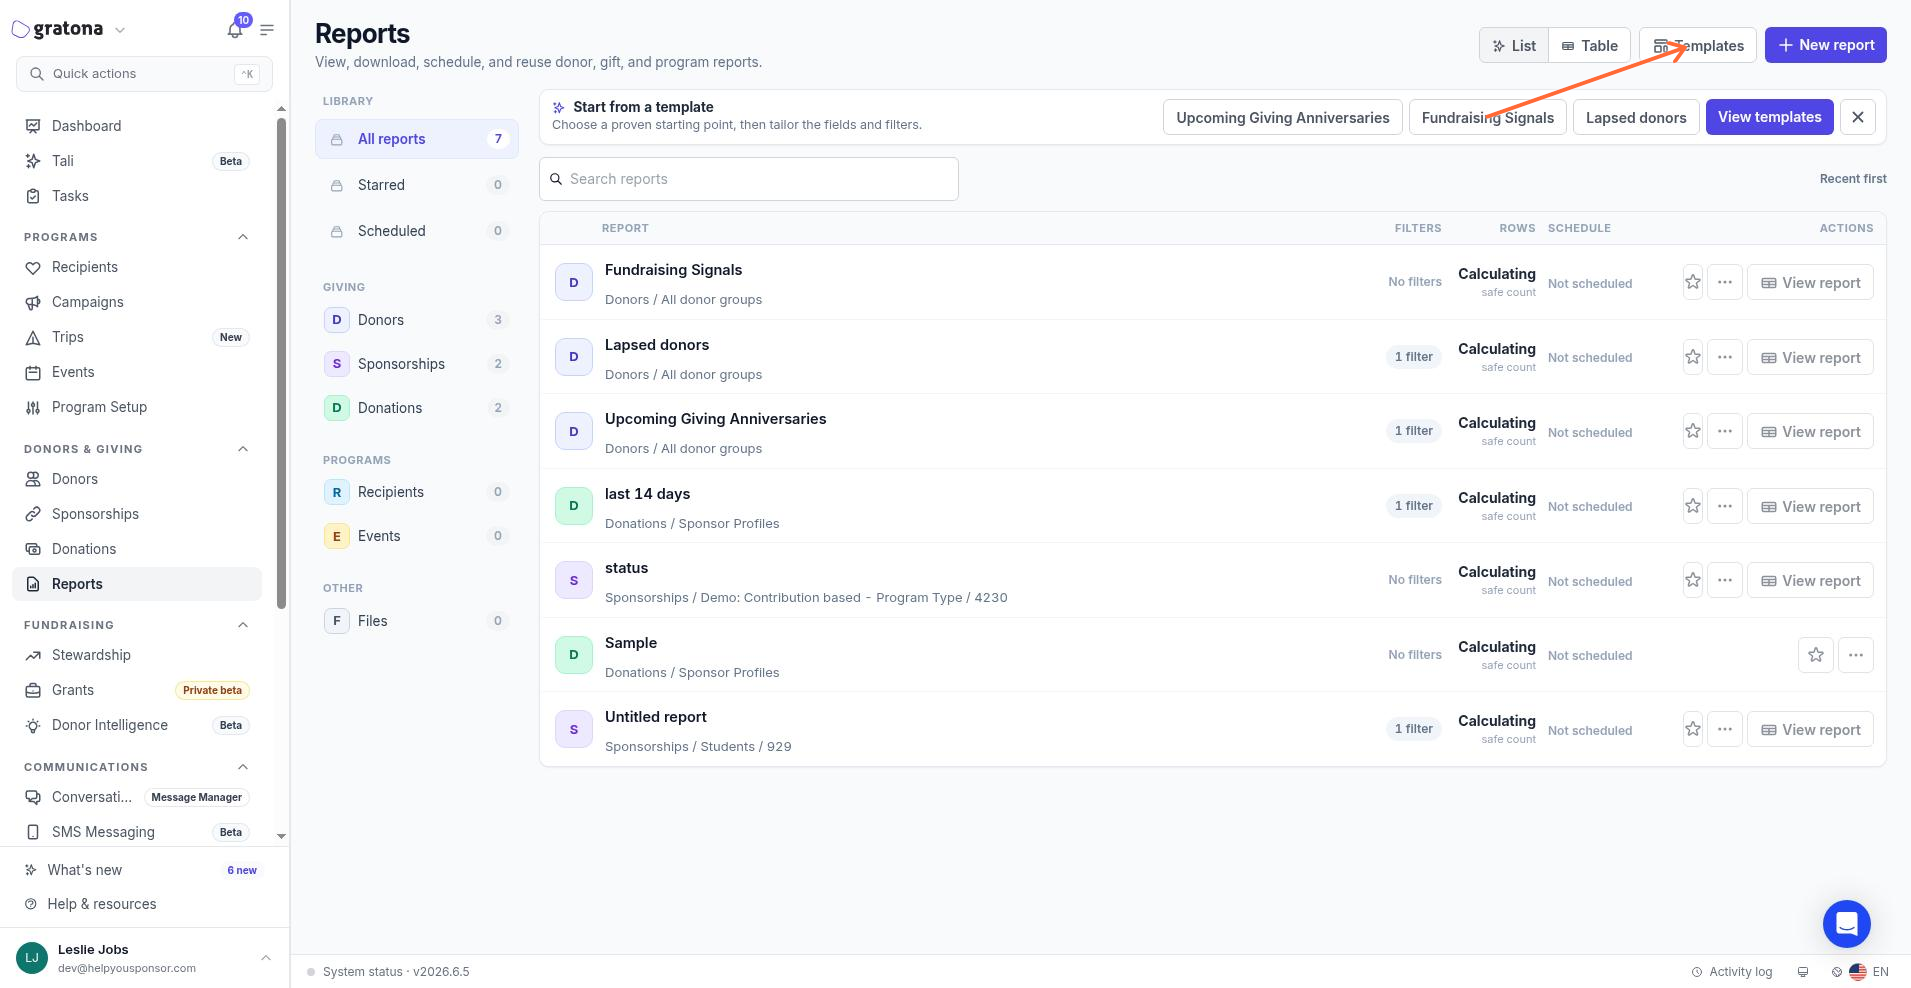
The Reports library. Select New report to open the report builder.
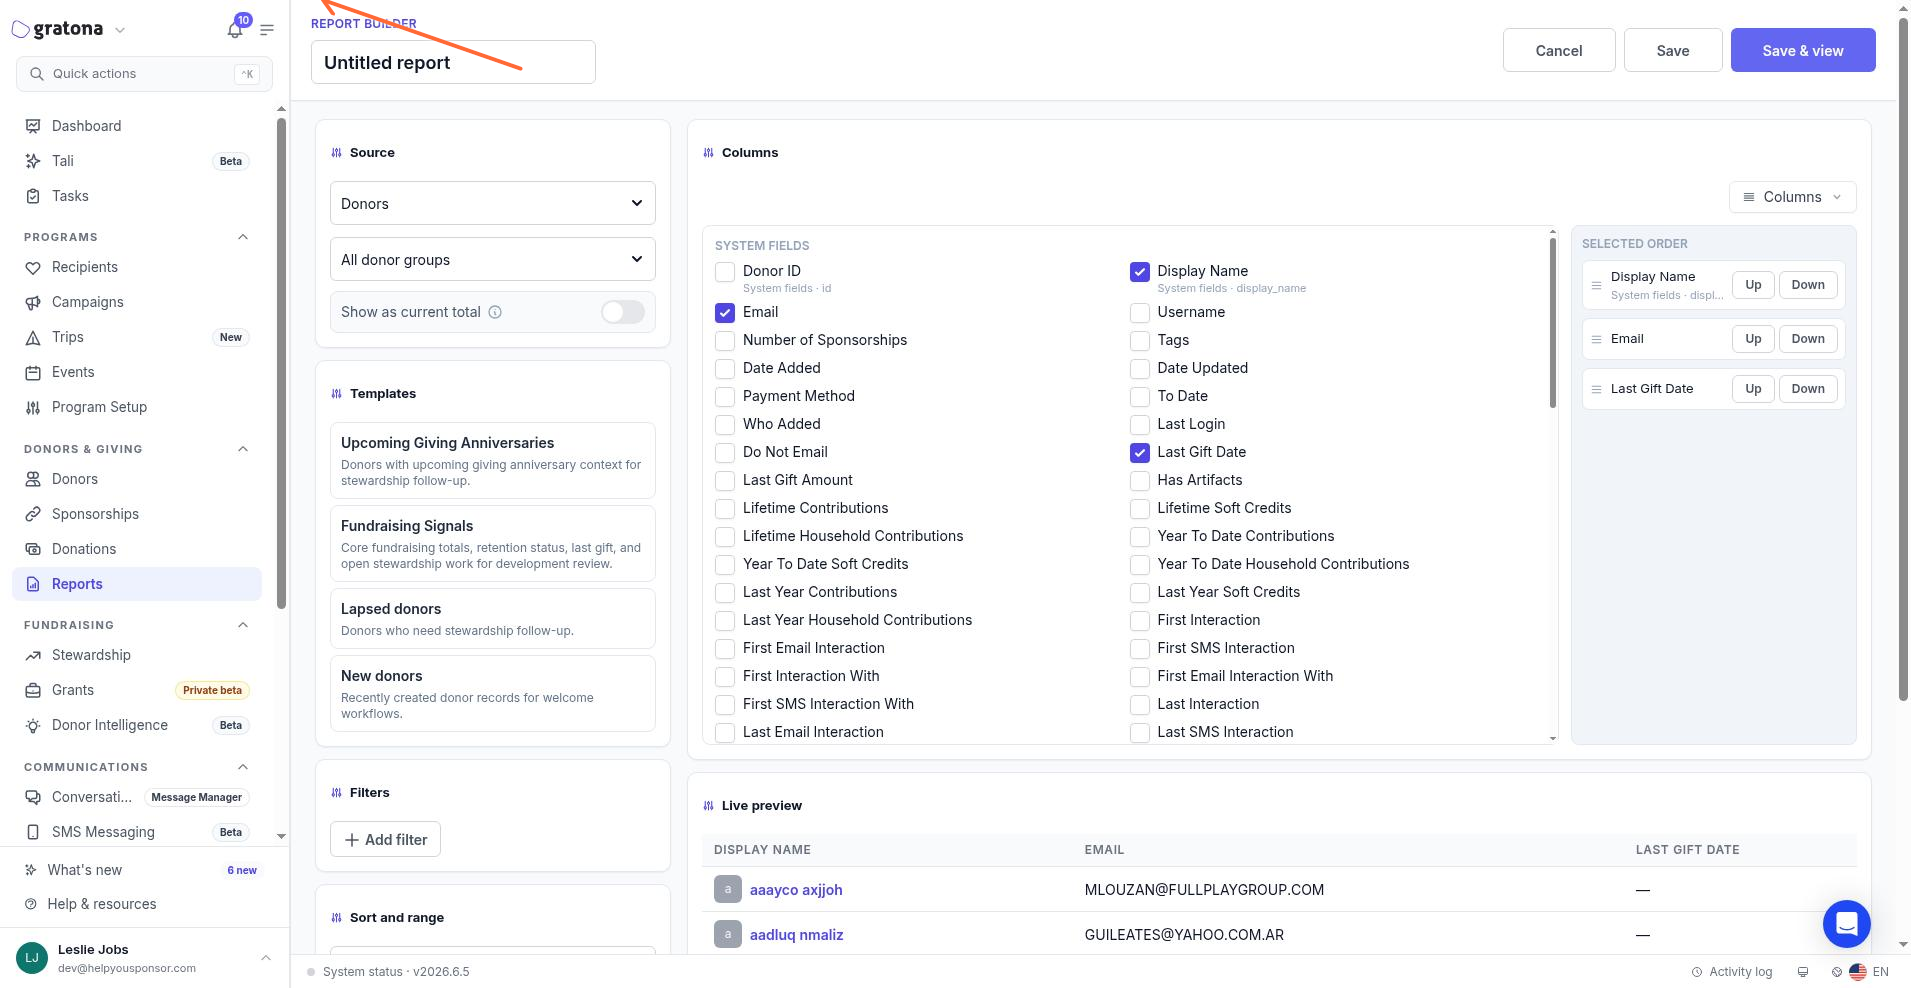
The Sort and range step in the report builder, with the date range set to All time.
Year-to-date reporting
Use This year for year-to-date reports. This covers all activity from the start of the current calendar year through today — donations, sponsorships, and other data from the selected source module — without needing to set specific dates.
Monthly or custom date boundaries
Use Custom range to set specific start and end dates. For a monthly report, set the first and last day of the month — for example, June 1 to June 30. For any other reporting period, enter the dates that match your needs.
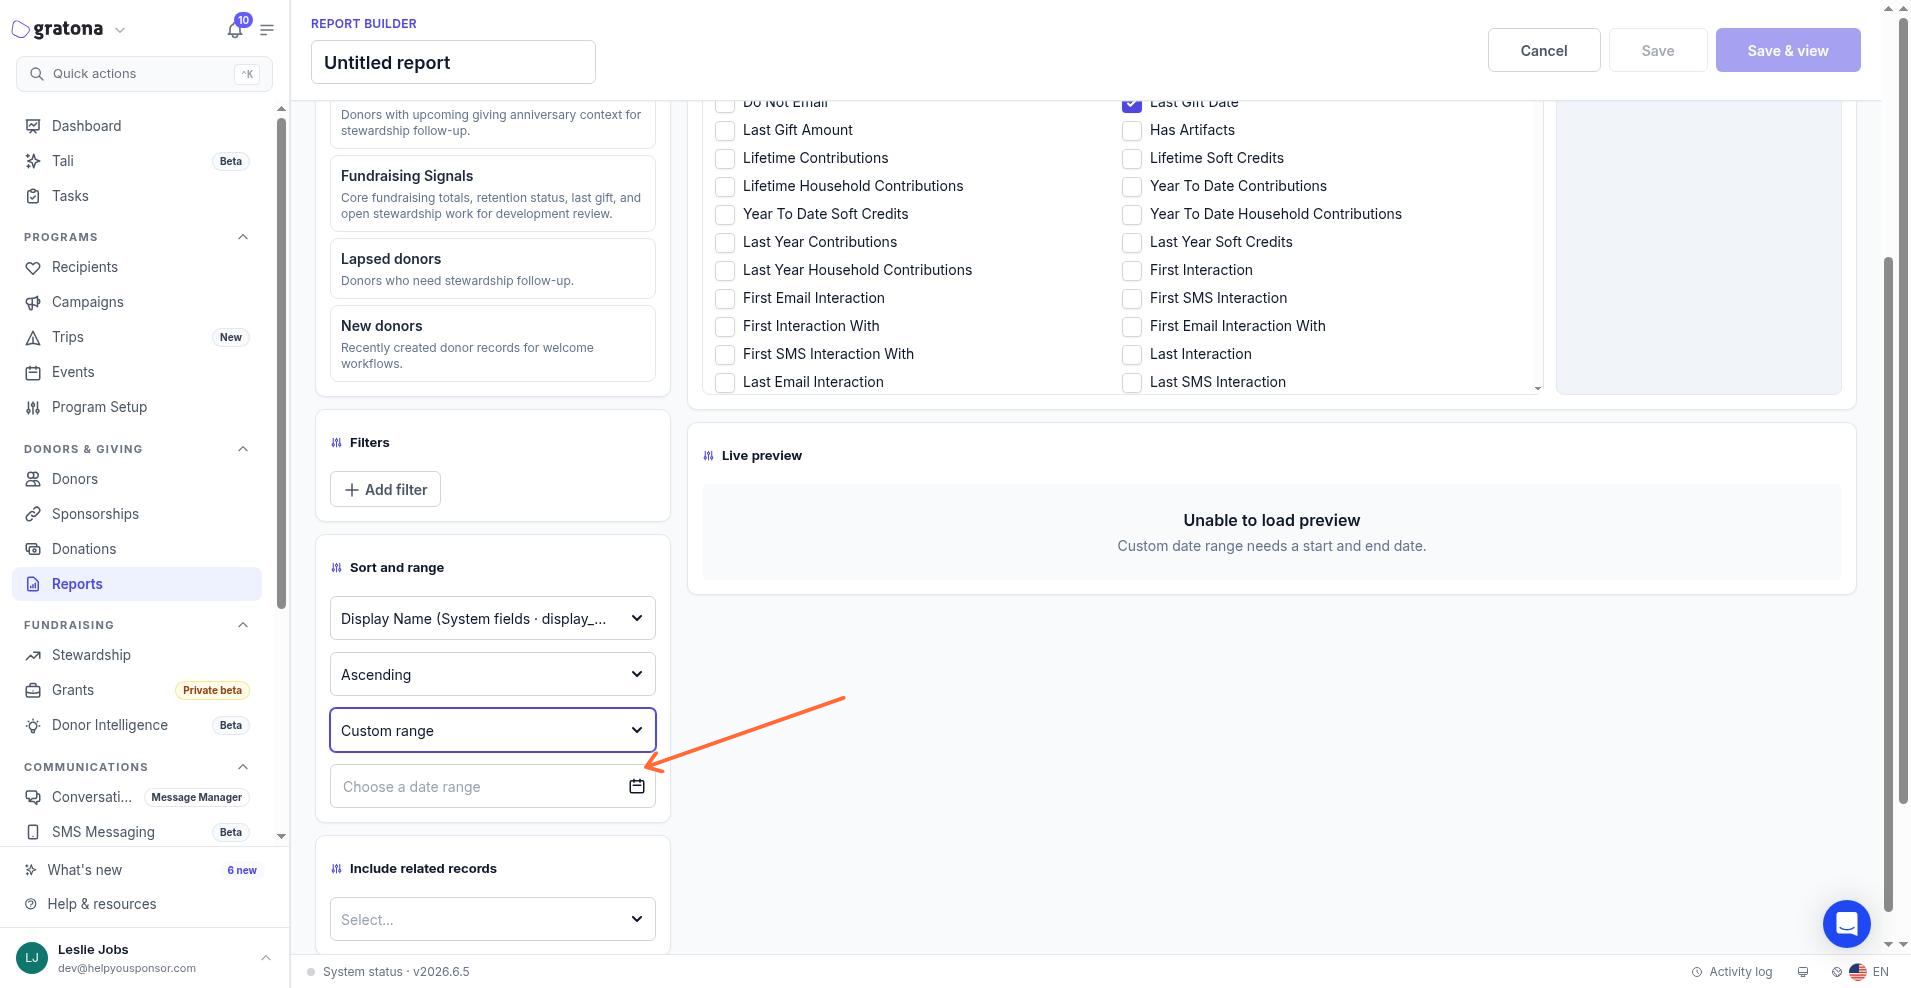
Selecting Custom range reveals a date input where you can set specific start and end dates.
Sponsorship reports and date ranges
Reports built from the Sponsorships source module use the same date range options. Choose Sponsorships as the source in the report builder, then set the date range for the period you need.
The Donations table has its own date range control for worksheet views, separate from the report builder. For donation review without a saved report, use the date range in the Donations worksheet instead.