
Connect Gratona to QuickBooks Online
Updated 2 months ago
Authorize the correct QuickBooks Online company, configure one eligible program, then validate with a controlled first sync before you roll out additional programs. You can start from Integrations or Connected Apps.
For the object model and related topics, see the QuickBooks Online integration overview.
Before you start
You need an active QuickBooks Online company and at least one Gratona program that has both a program form and a donor form. Only those programs appear for QuickBooks setup.
Decide which QuickBooks Online company to authorize.
Confirm the currencies you use in Gratona and QuickBooks. If they differ, see Synchronized Currency.
Choose one program to configure and test first.
After you connect, Gratona maps:
Donors to QuickBooks Customers
Recipients to QuickBooks Service Items
Donations to QuickBooks Sales Receipts
Connect from Integrations
Use Integrations when you want to authorize QuickBooks and open setup from the QuickBooks card.
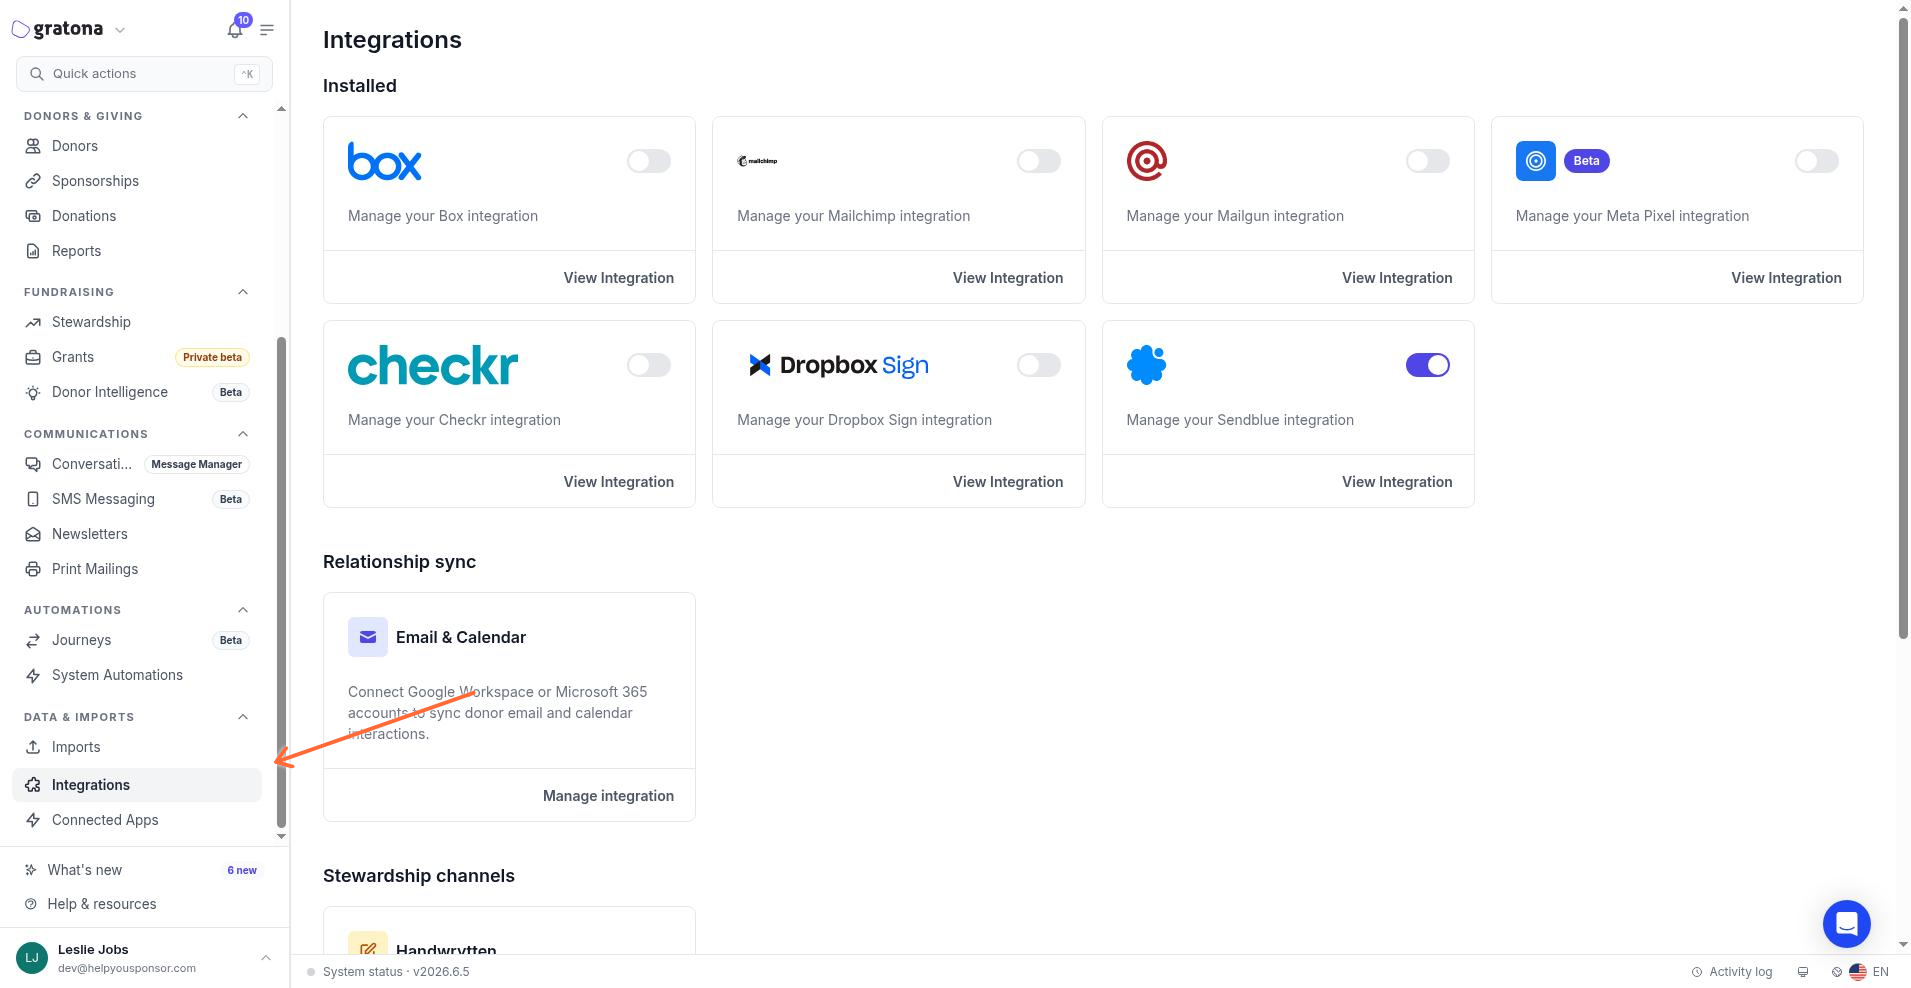
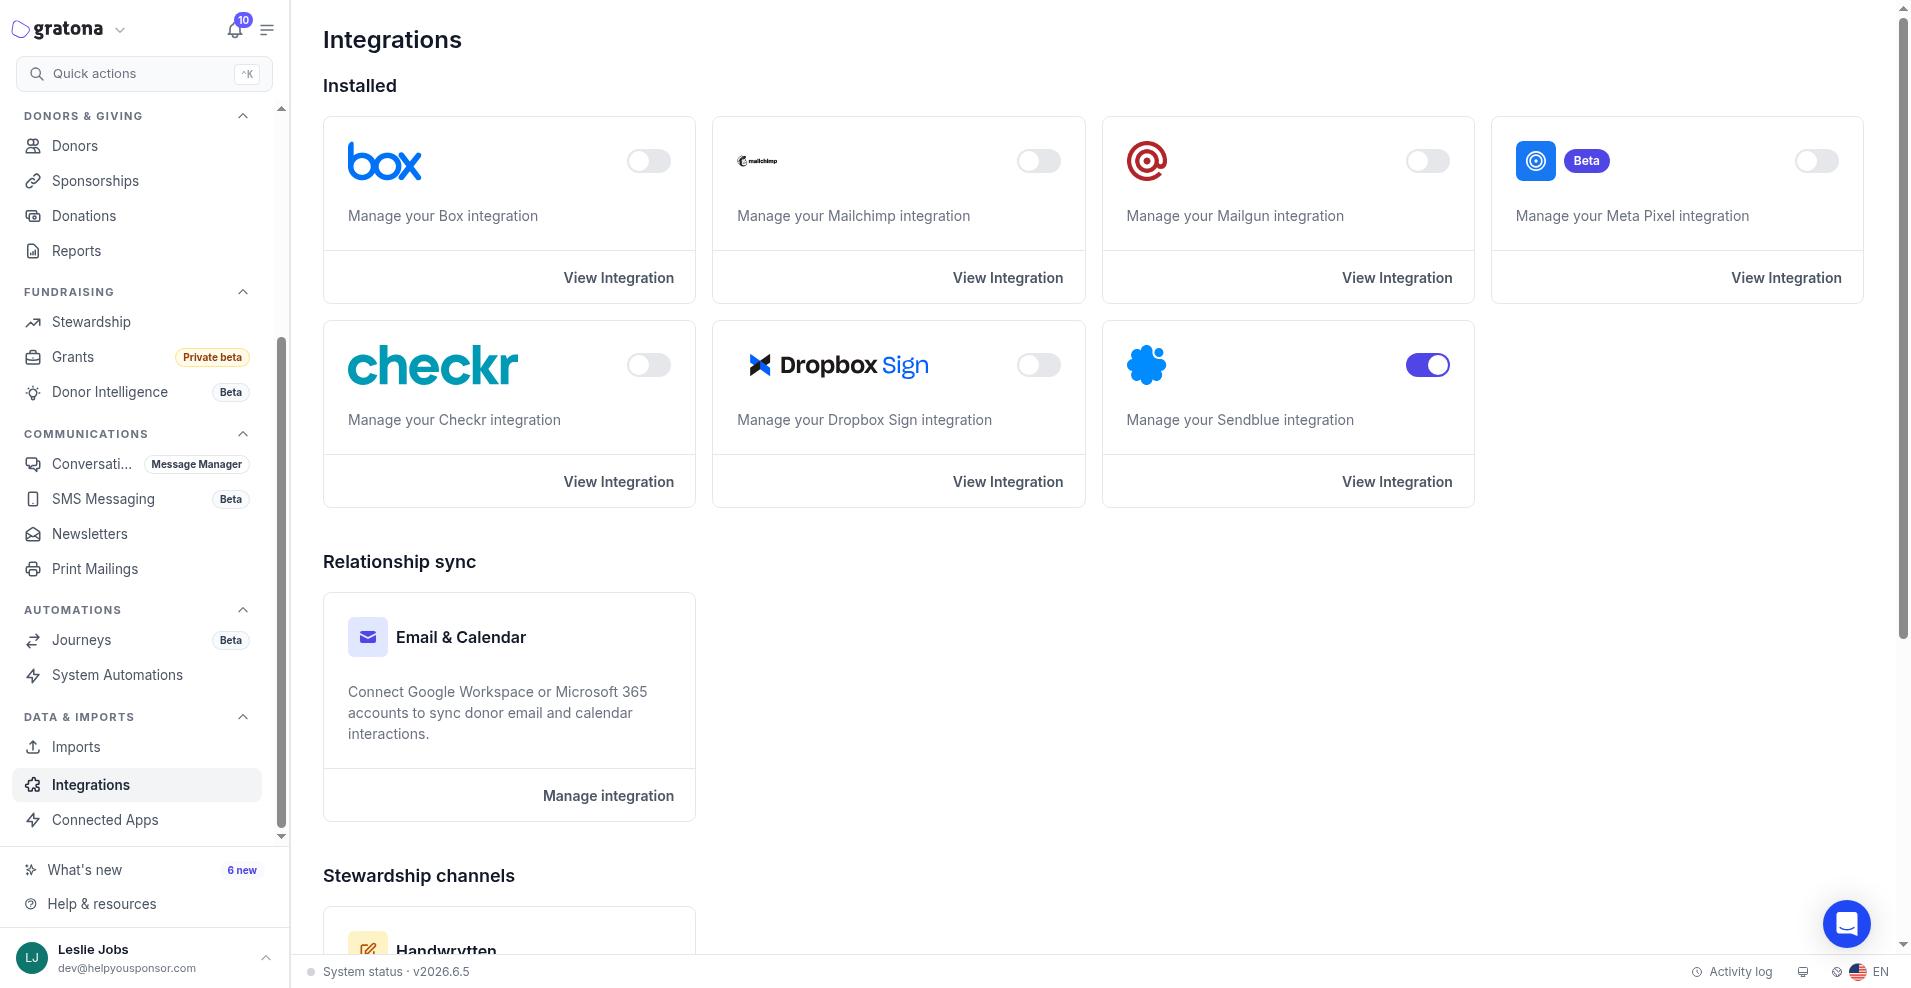
In the sidebar under Data & Imports, open Integrations.
Find the QuickBooks card.
Click Sign in to QuickBooks. If QuickBooks is already connected, click View Integration instead.
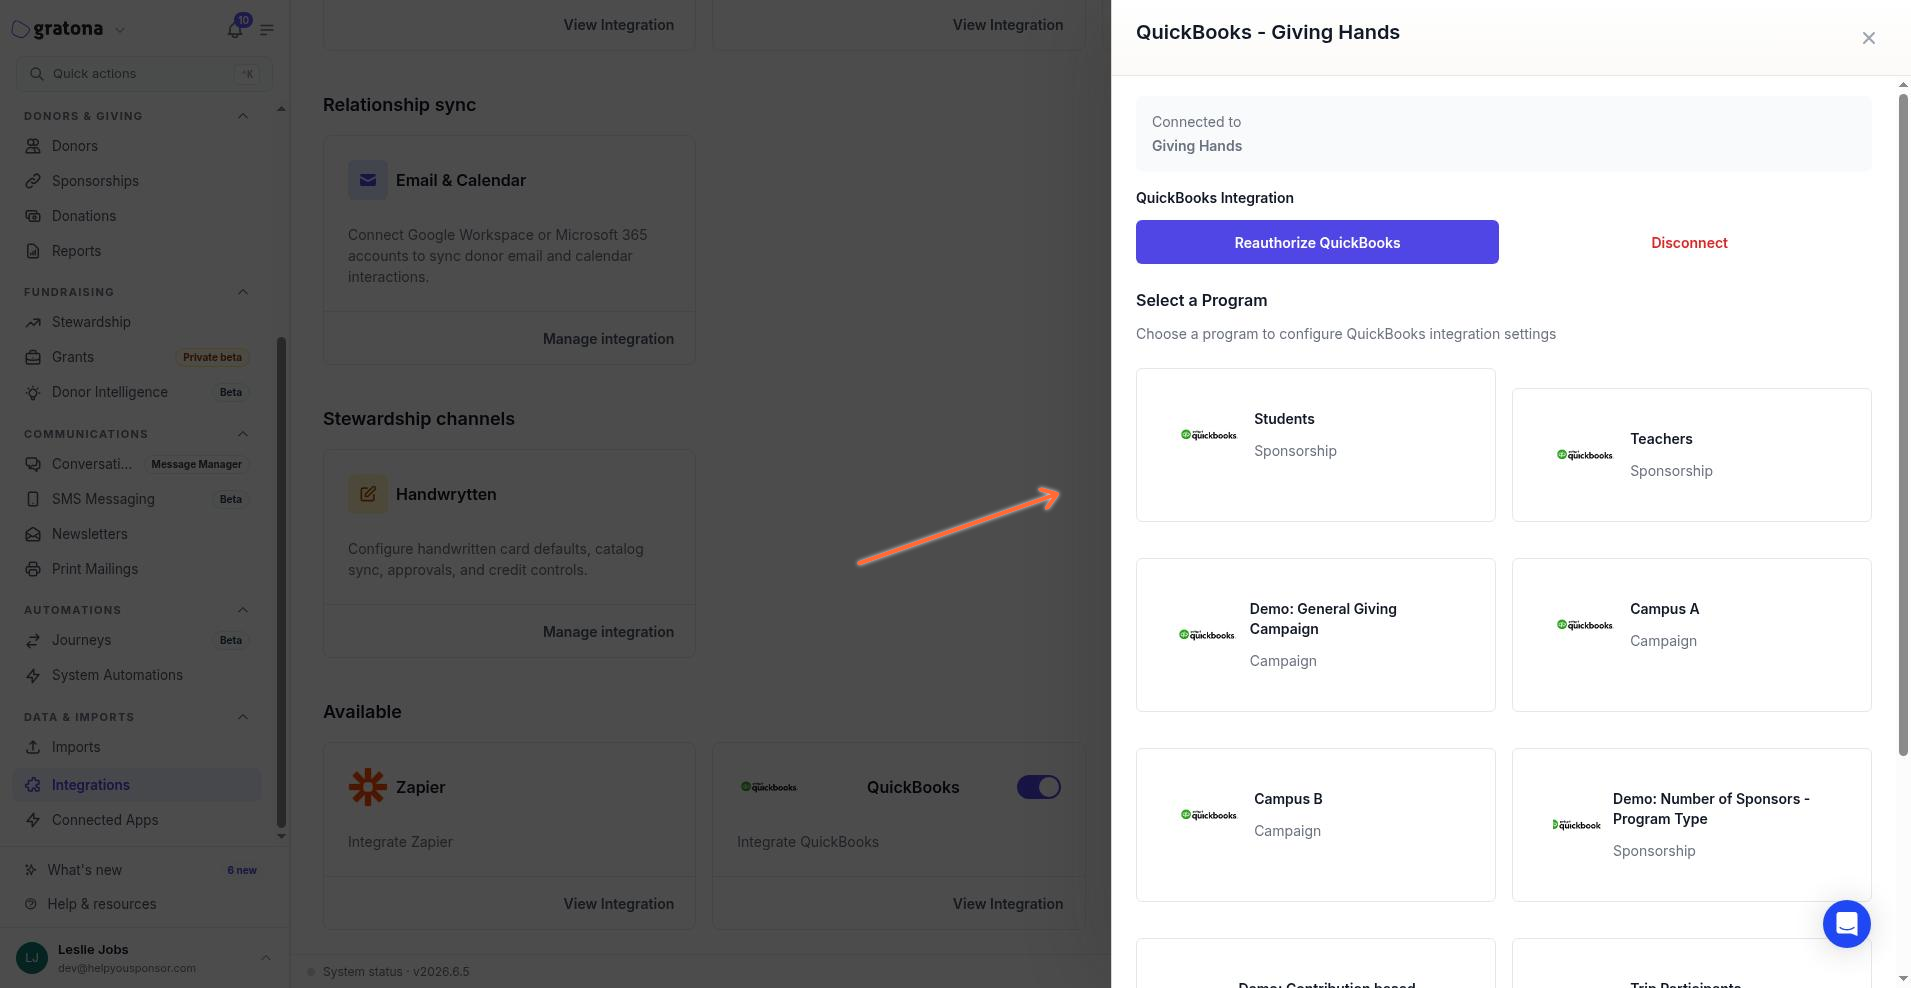
In the QuickBooks drawer, click Authorize QuickBooks (or Reauthorize QuickBooks if you are renewing access).
On QuickBooks Online, choose the company to link, then finish authorization.
When you return to Gratona, open the QuickBooks drawer again if it is closed. The card shows the connected state, and the drawer lists programs under Select a Program.
Connect from Connected Apps
Use Connected Apps when you want to add QuickBooks as a provider and manage connection health from the provider hub. Program mapping still uses the same QuickBooks configuration tabs after the connection exists.
In the sidebar, open Connected Apps.
Click Add provider.
Choose QuickBooks and start the provider connection.
Authorize the QuickBooks Online company when prompted.
When the provider shows as connected, open the QuickBooks connection to configure programs, sync type, and mappings.
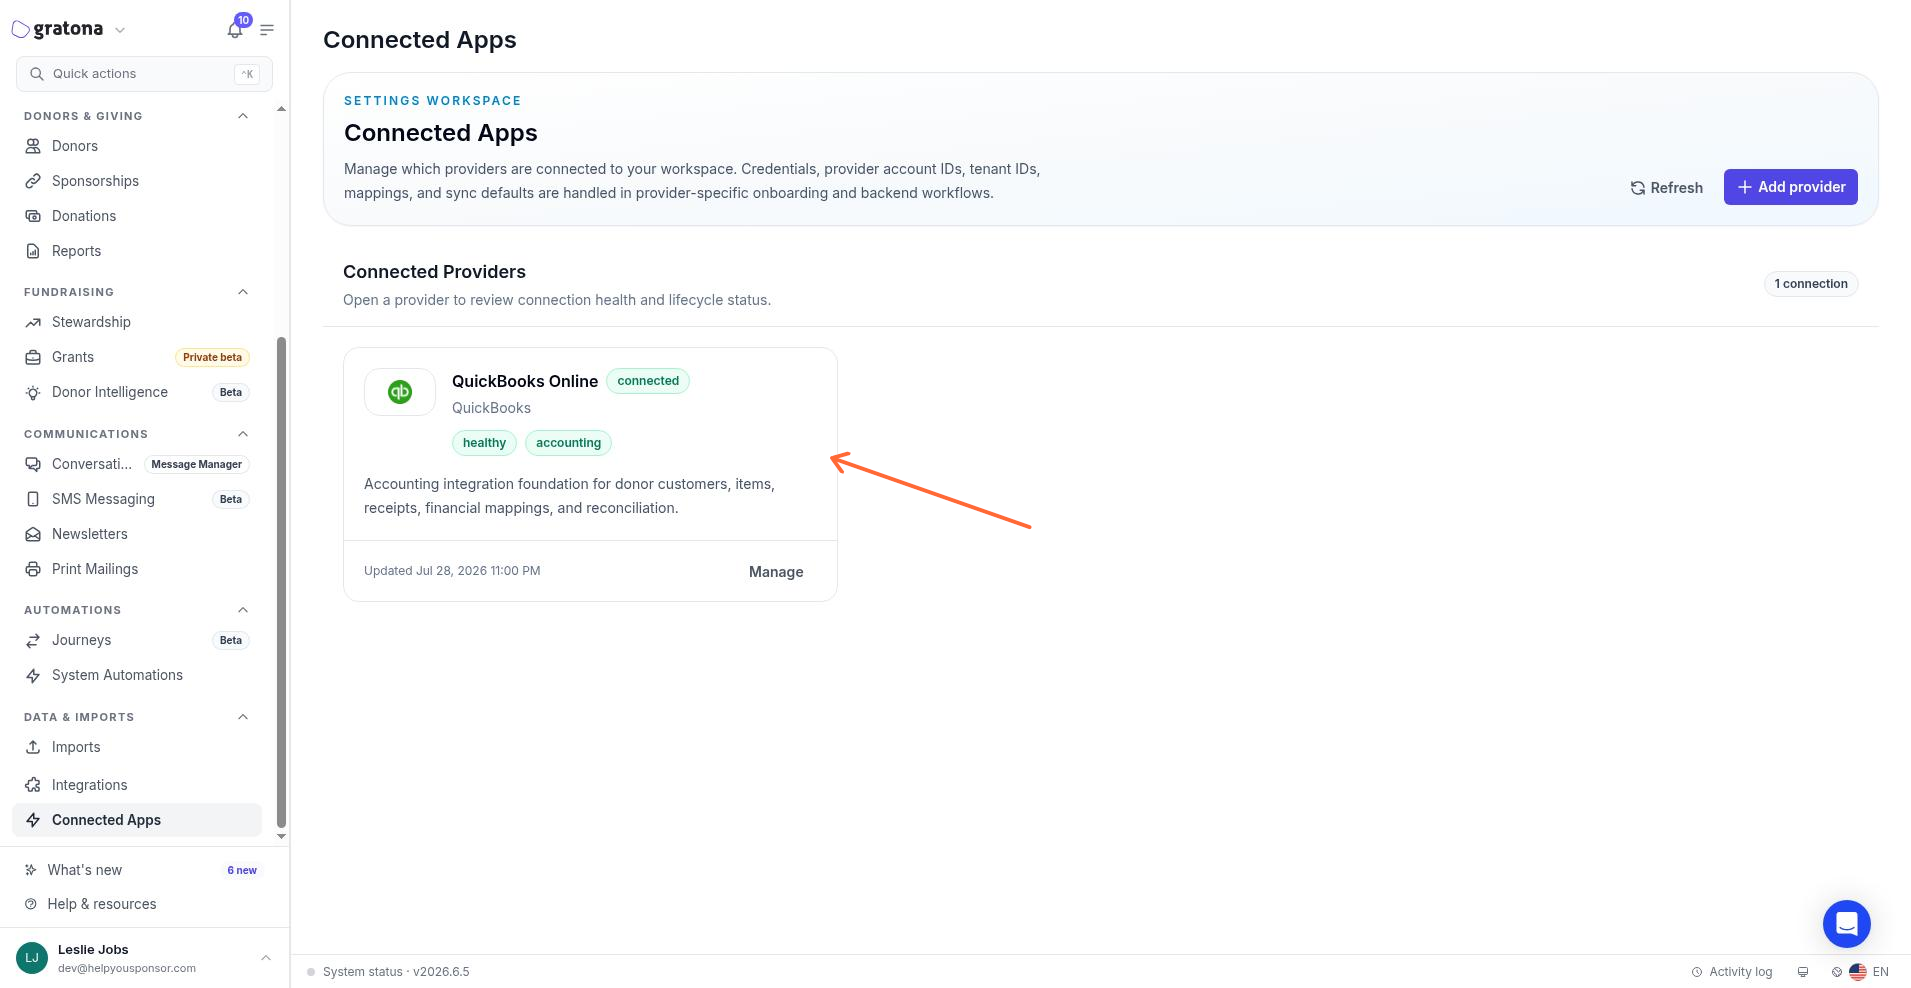
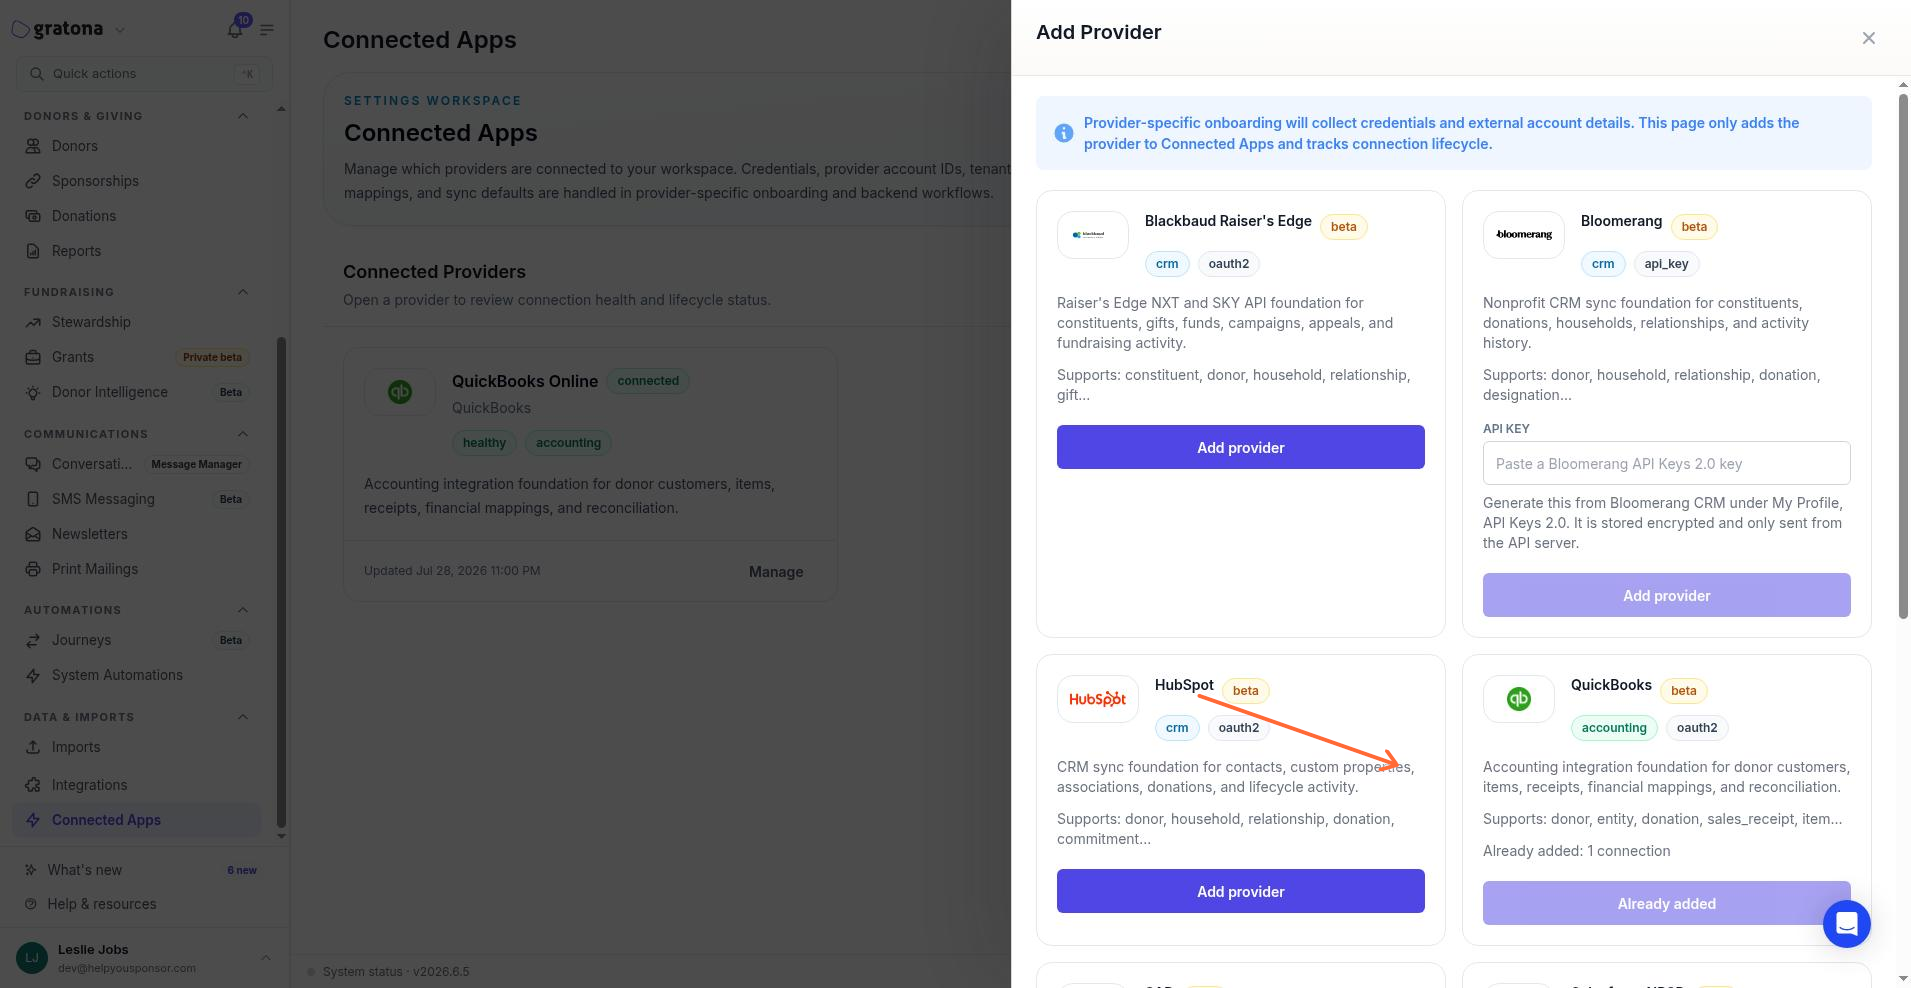
If QuickBooks is already connected, the provider card shows Already added. Open the existing connection instead of adding another one. For connection health, refresh, and reconnect actions, see Connected Apps.
If onboarding cannot start, Gratona shows Unable to start QuickBooks onboarding right now. Try again, or connect from the Integrations QuickBooks card instead.
Choose a program and sync settings
After QuickBooks is connected, select one program and set sync direction and delete behavior before you map fields.
Open the QuickBooks drawer from Integrations, or open the QuickBooks connection from Connected Apps.
Under Select a Program, choose a program. If none appear, Gratona shows No eligible programs found. Add both a program form and a donor form to the program, then return here.
Set Sync Type to Gratona -> QBO, QBO -> Gratona, or Two way (default).
Leave Delete/deactivate linked QuickBooks records when deleted in Gratona off unless finance wants it. When on, customers and service items are made inactive in QuickBooks, and sales receipts are deleted.
Leave Delete linked Gratona records when deleted/deactivated in QuickBooks off unless finance wants it. When on, QuickBooks customer and item deactivation can delete linked Gratona donors and recipients, and QuickBooks sales receipt deletion can delete linked Gratona donations.
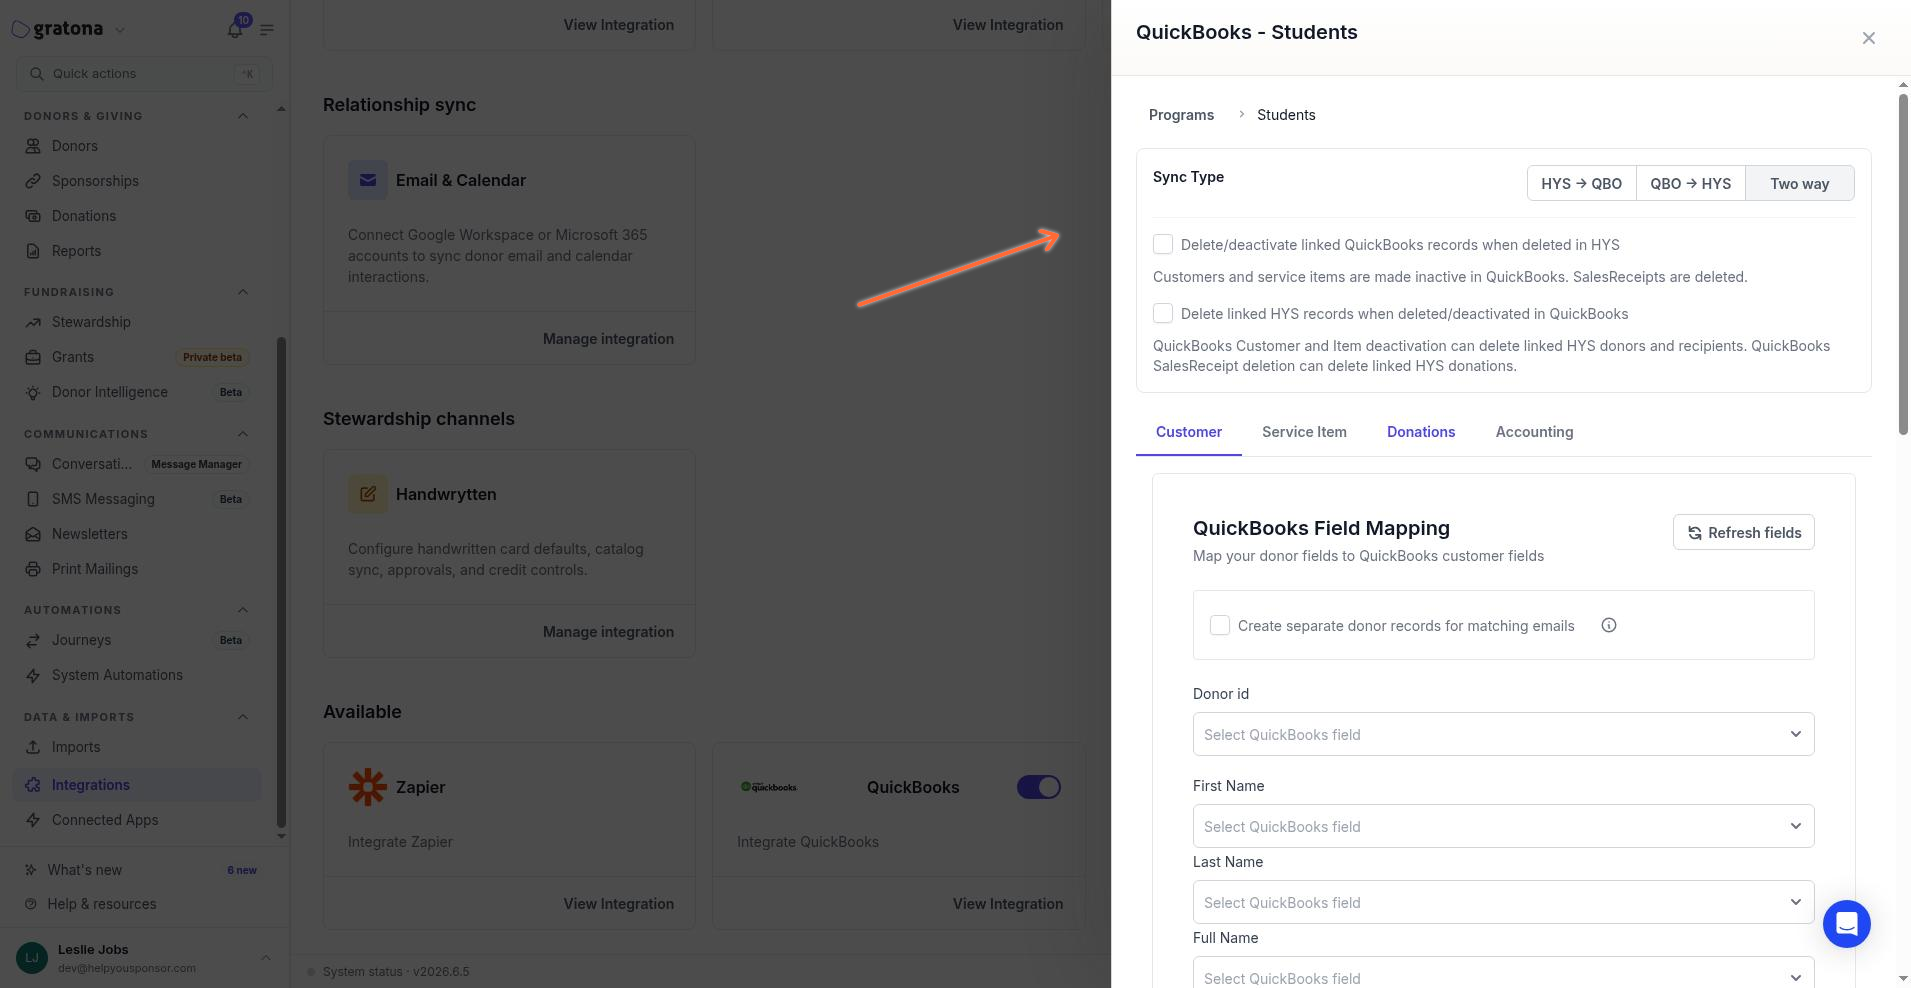
Both delete toggles default to off. Deletion sync is separate from disconnect. Turning a delete toggle on can remove live accounting or sponsorship records.
Map customer fields
Use the Customer tab to map donor fields to QuickBooks customer fields.
Open the Customer tab.
Under QuickBooks Field Mapping, match each donor field to a QuickBooks field.
Click Refresh fields if you need Gratona to query QuickBooks for the latest customer fields.
Leave Create separate donor records for matching emails off to update and link the existing donor when emails match. Turn it on only if you want a separate donor for the QuickBooks customer even when another donor already uses that email.
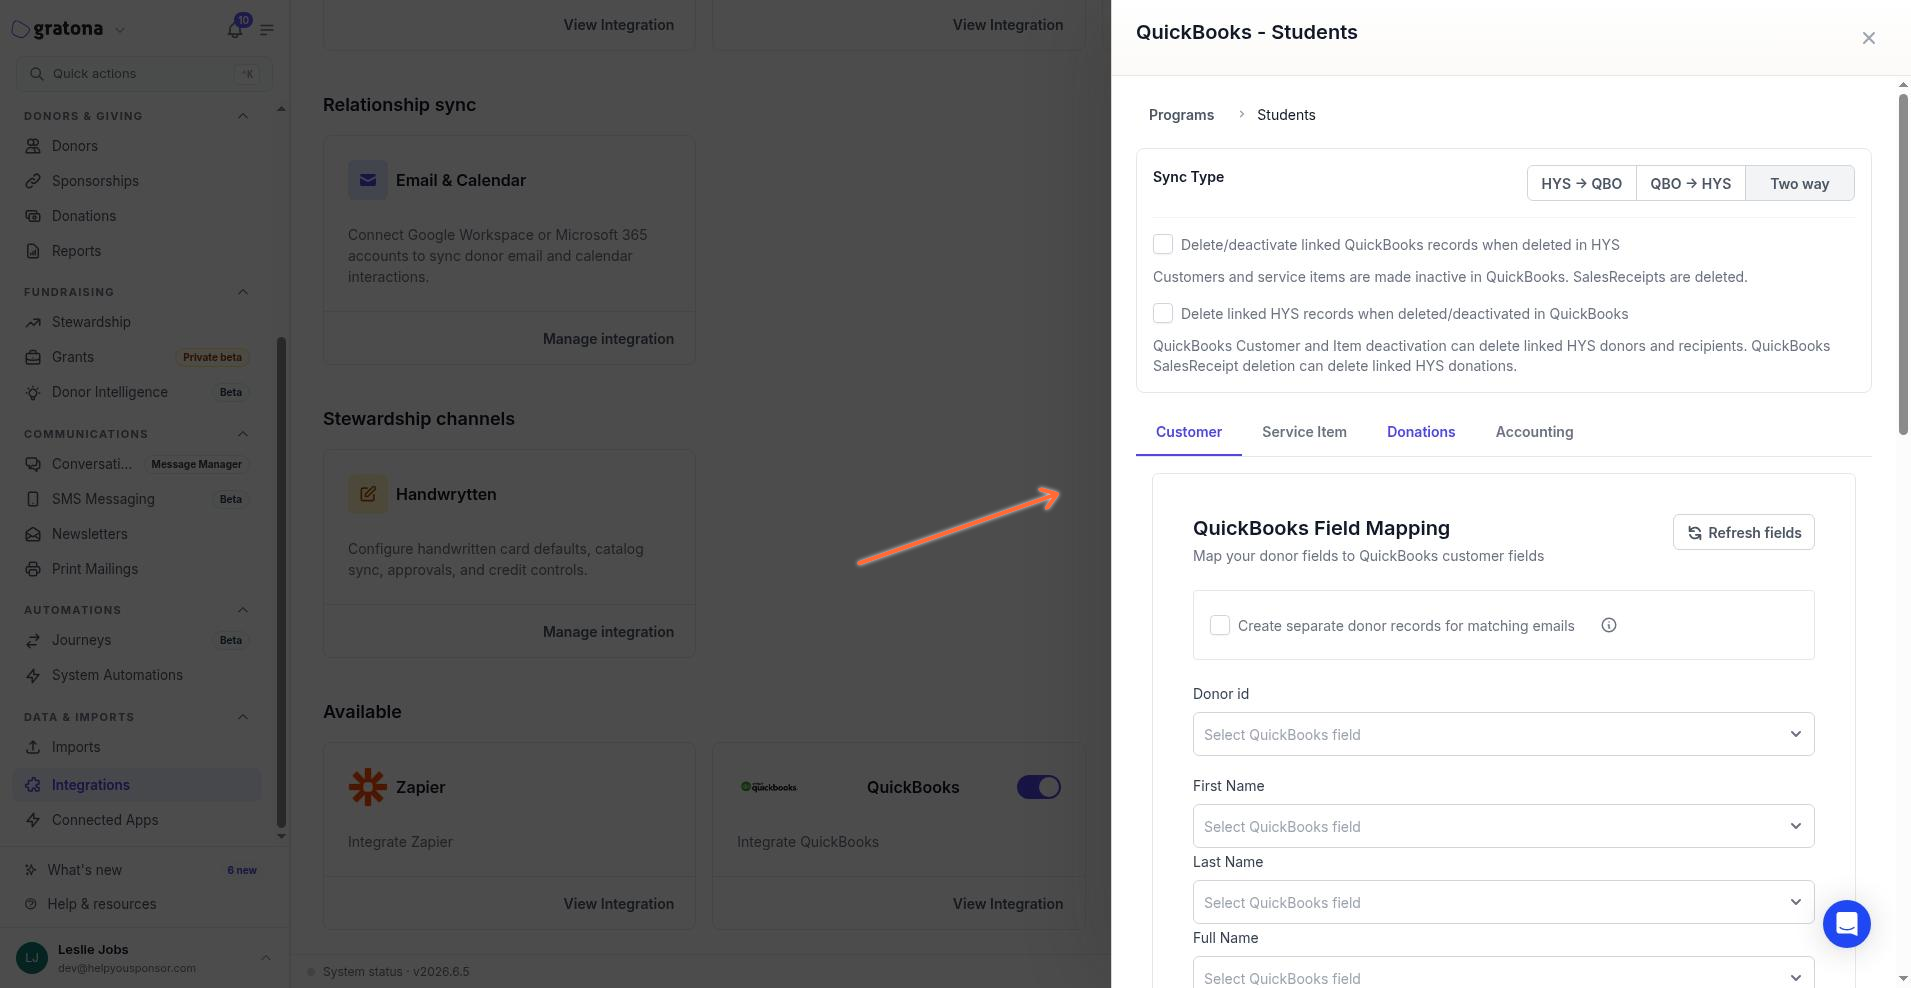
For how donor and customer records relate after setup, see Adding Donors (Customers).
Map service items
Use the Service Item tab to map program fields to QuickBooks item fields and save the item category.
Open the Service Item tab.
Under QuickBooks Program Field Mapping, map program fields to QuickBooks item fields.
Choose a Category.
Click Save Category.
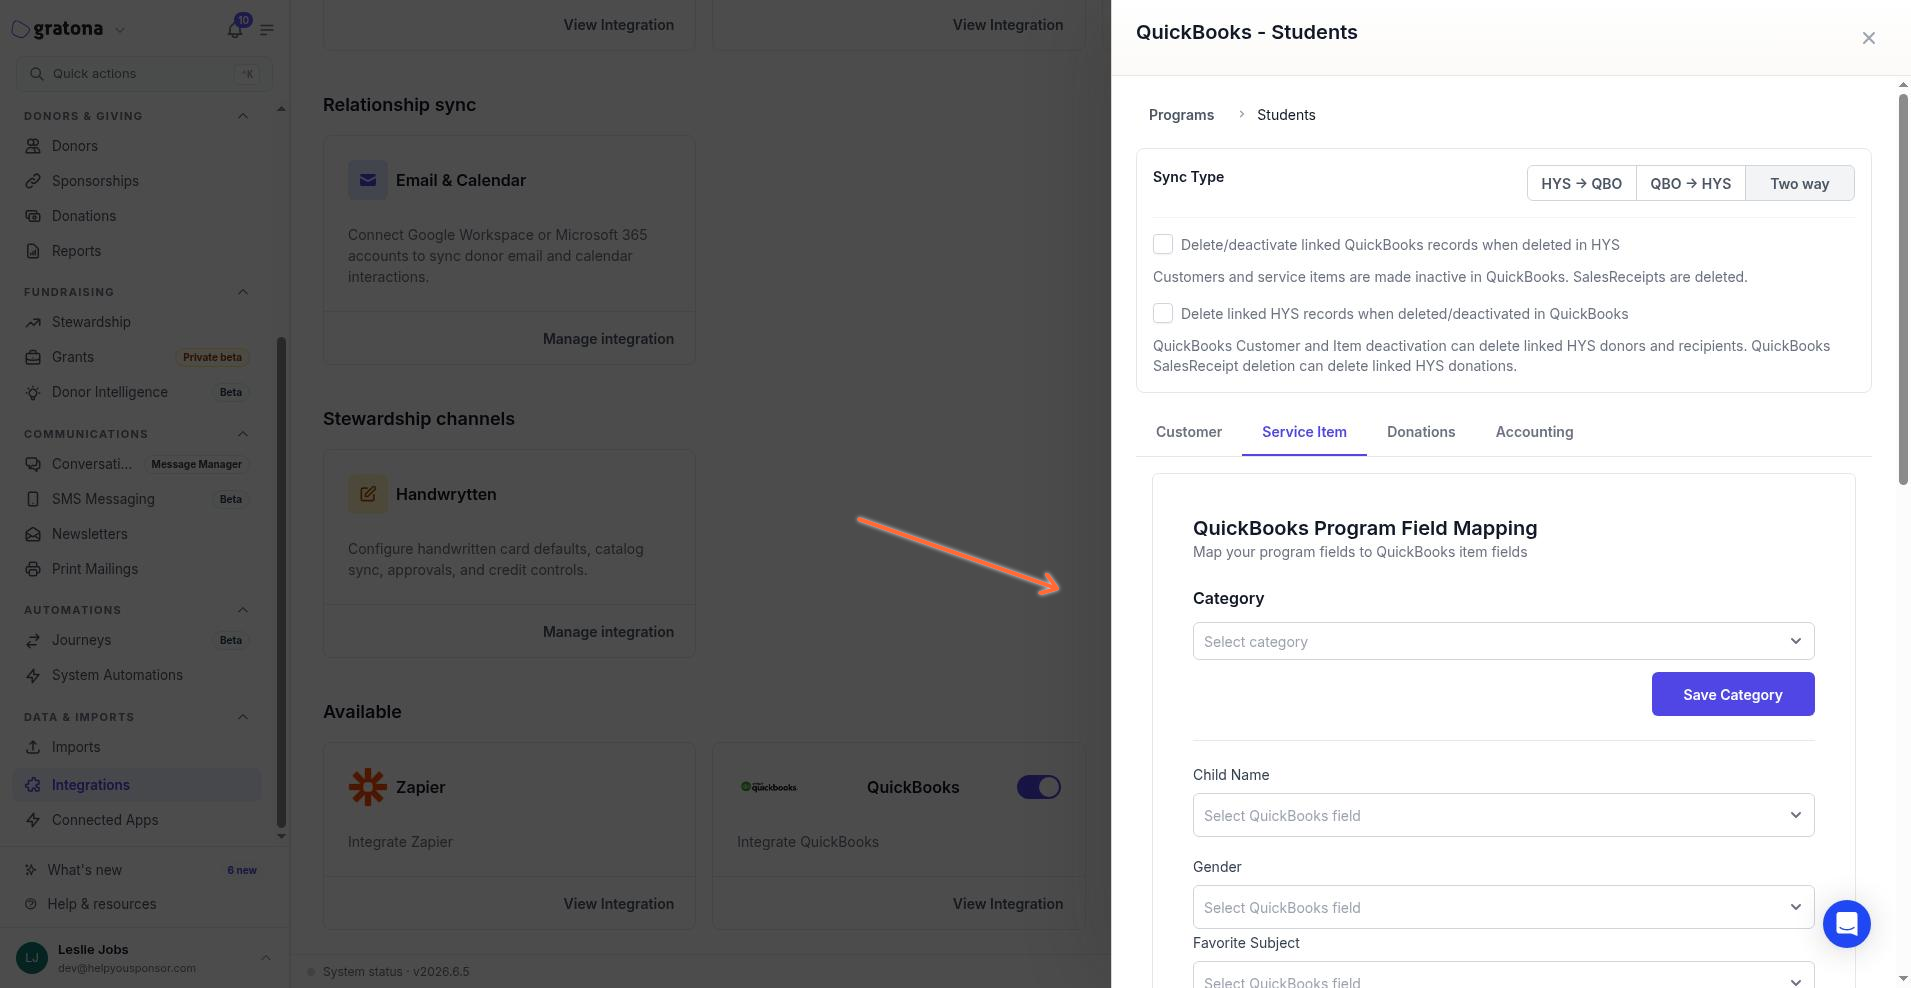
For recipient and service item behavior after setup, see Recipients (Service item).
Configure donations
Use the Donations tab to control how donations become QuickBooks sales receipts.
Open the Donations tab.
Under Donations to Sales Receipts, set Sales Receipt Deposit Account (Optional) if sales receipts should deposit into a Bank or Other Current Asset account.
Under Additional Donation Items by Designation, set Default Item for Additional Gifts (Optional) if needed for gifts that are not sponsorship income.
Add any Designation Overrides with Add to map specific designations to QuickBooks items.
Click Save Donation Settings for deposit account changes, and Save Item Settings if you changed additional gift items or designation overrides.
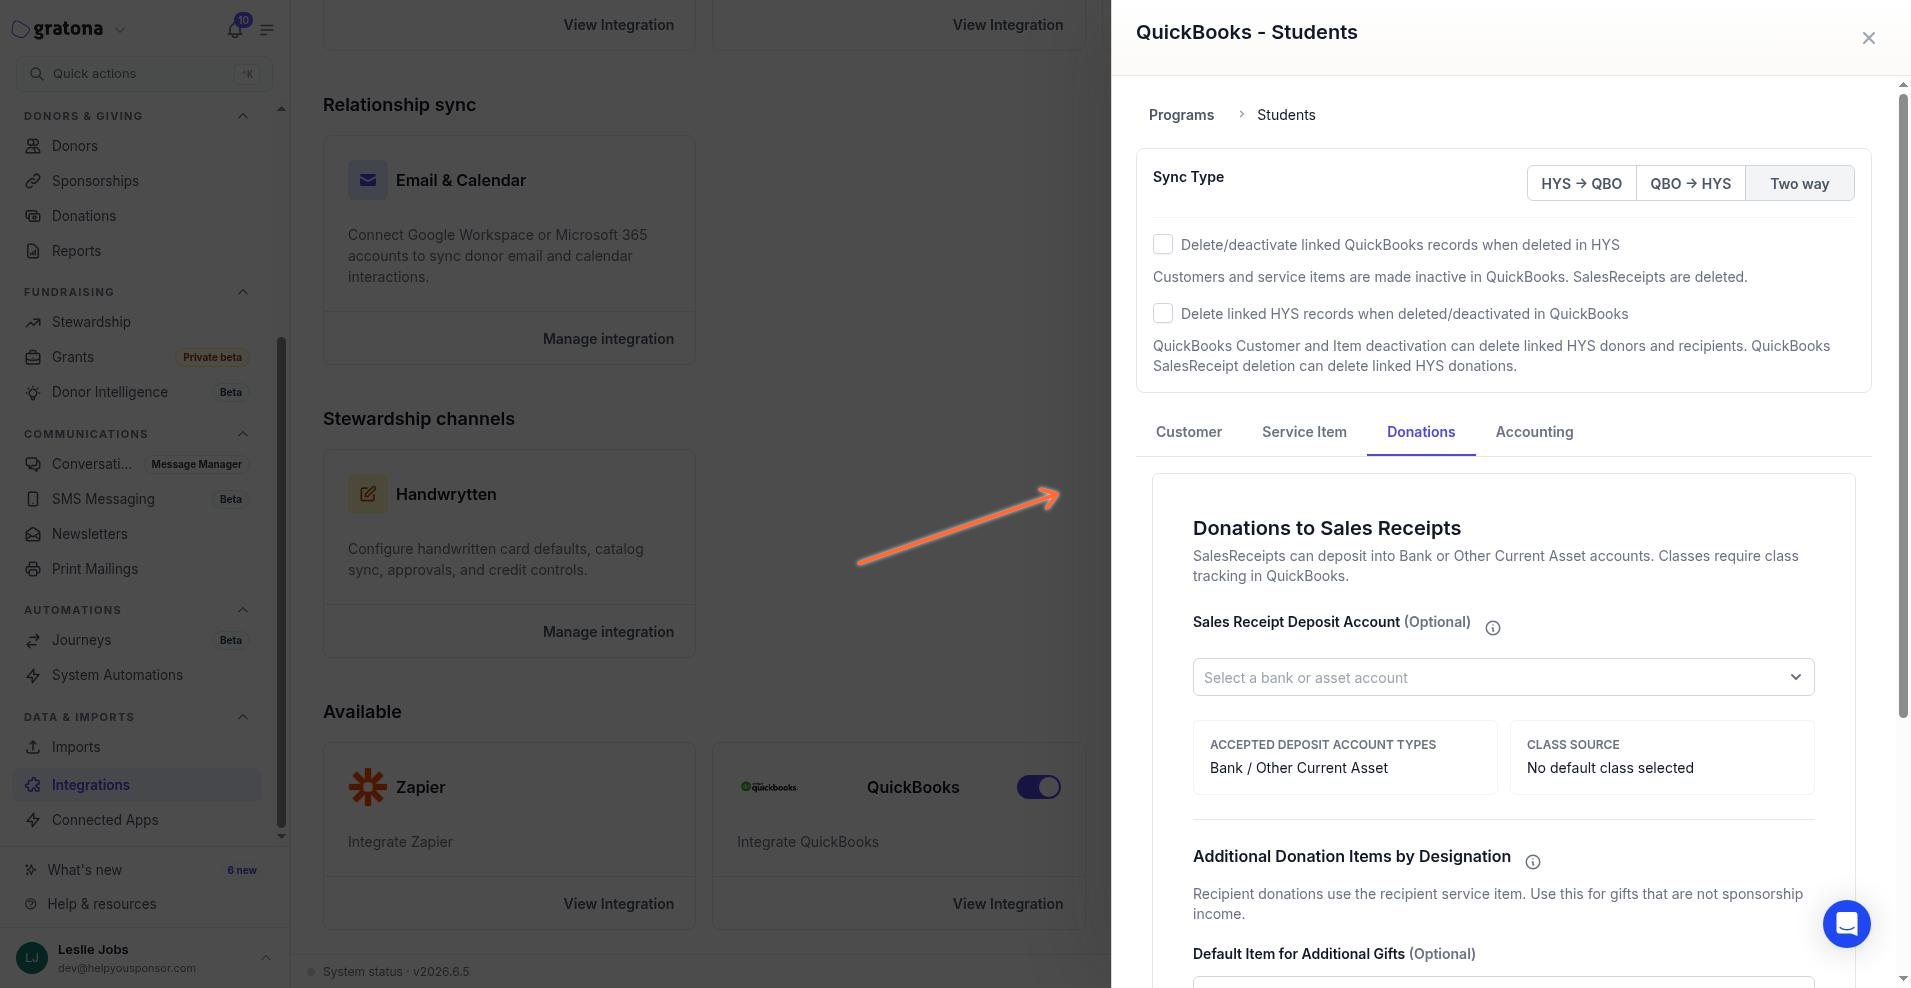
Recipient donations use the recipient service item. For deposit accounts, designation overrides, and classes, see Map donations, designations, accounts, and classes. For object-level donation sync notes, see Donations (Sales Receipt).
Configure accounting
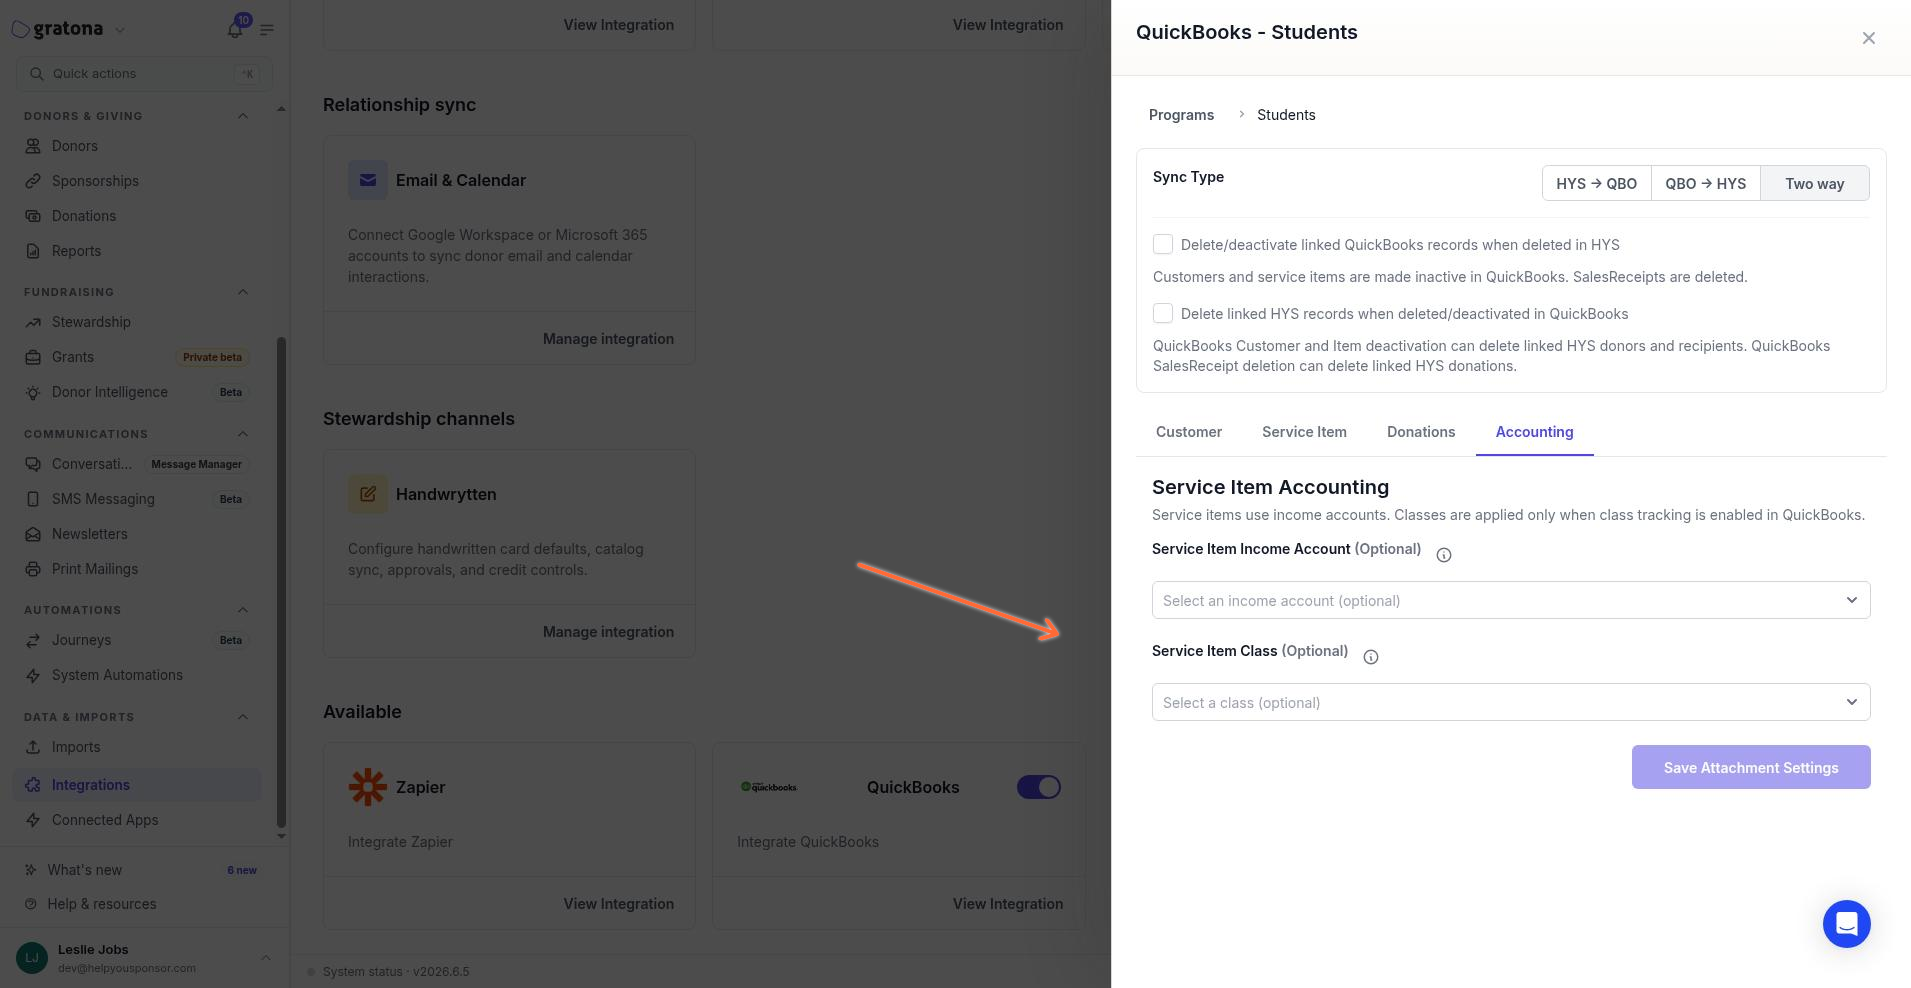
Use the Accounting tab to set the service item income account and class.
Open the Accounting tab.
Under Service Item Accounting, set Service Item Income Account (Optional).
Set Service Item Class (Optional) if class tracking is enabled in QuickBooks. This stores the default QuickBooks class for the program.
For campaign programs with entity-specific class mapping, assign entity classes where needed. Entity classes override the program default; entities without a specific class still use the default class.
Click Save Attachment Settings.
What syncs after setup
Create and update traffic follows the program Sync Type. Data created before the integration does not sync retroactively.
New donors can create QuickBooks customers, and new QuickBooks customers can create donors, depending on sync direction and your customer field mapping.
New recipients can create QuickBooks service items, and new service items can create recipients, depending on sync direction and your service item mapping.
New donations create QuickBooks sales receipts from Gratona. A donation sales receipt needs a resolvable QuickBooks customer and item; otherwise the sync skips because the customer or item is not found.
Donations flow Gratona → Sales Receipt. Do not rely on existing QuickBooks sales receipts to create donations in Gratona.
Verify the first sync
After you configure one program, validate with a known test donor and a small test donation before you configure additional programs. This is a manual operations check, not a product test mode.
Confirm you authorized the correct QuickBooks Online company.
Confirm Sync Type matches the direction your finance team wants.
Confirm both delete toggles are still off unless finance intentionally enabled them.
Create or use a known test donor and a small test donation for a mapped recipient or designation.
In QuickBooks, verify the Customer, Service Item, Sales Receipt amount, deposit account if you set one, and class if you set one.
Only then configure additional programs the same way.
There is no product undo path for a bad bulk rollout. Disconnect removes all QuickBooks integration settings and mappings and cannot be undone. Deletion sync is separate and defaults off.
Reauthorize or disconnect
If authorization expires, Gratona shows QuickBooks authorization expired. Please re-authorize your QuickBooks connection. Click Reauthorize QuickBooks and complete QuickBooks Online authorization again.
To remove the integration from the Integrations drawer:
Open the QuickBooks drawer.
Click Disconnect.
Confirm Disconnect QuickBooks. All QuickBooks integration settings and mappings are removed. This action cannot be undone.
You can also disconnect or remove the provider from Connected Apps when you manage connection health there. If sync fails after setup, see Troubleshoot QuickBooks synchronization.