
Newsletter
Updated 3 weeks ago
.
Newsletter
The Newsletter feature allows you to create and send email updates to donors at scale. Use it to draft donor updates, select an audience, personalize messages with donor merge tags, send the message immediately, or schedule it for later.
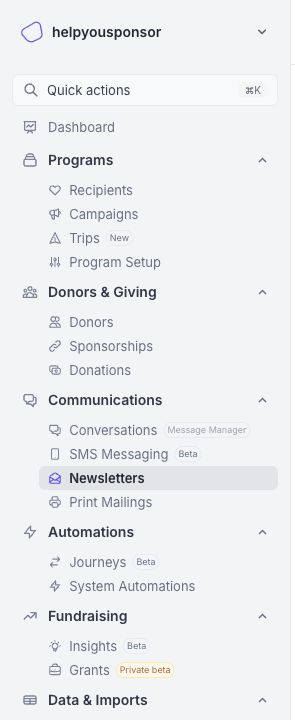
To navigate to newsletters, click "Newsletters" under "Communications" on the main menu.
Newsletters table
The Newsletters page lists the newsletters created for your account. At the top of the page, summary cards show the total number of newsletters and counts for drafts, scheduled newsletters, sending newsletters, sent newsletters, partially sent newsletters, delivery-unconfirmed newsletters, failed newsletters, and skipped newsletters.
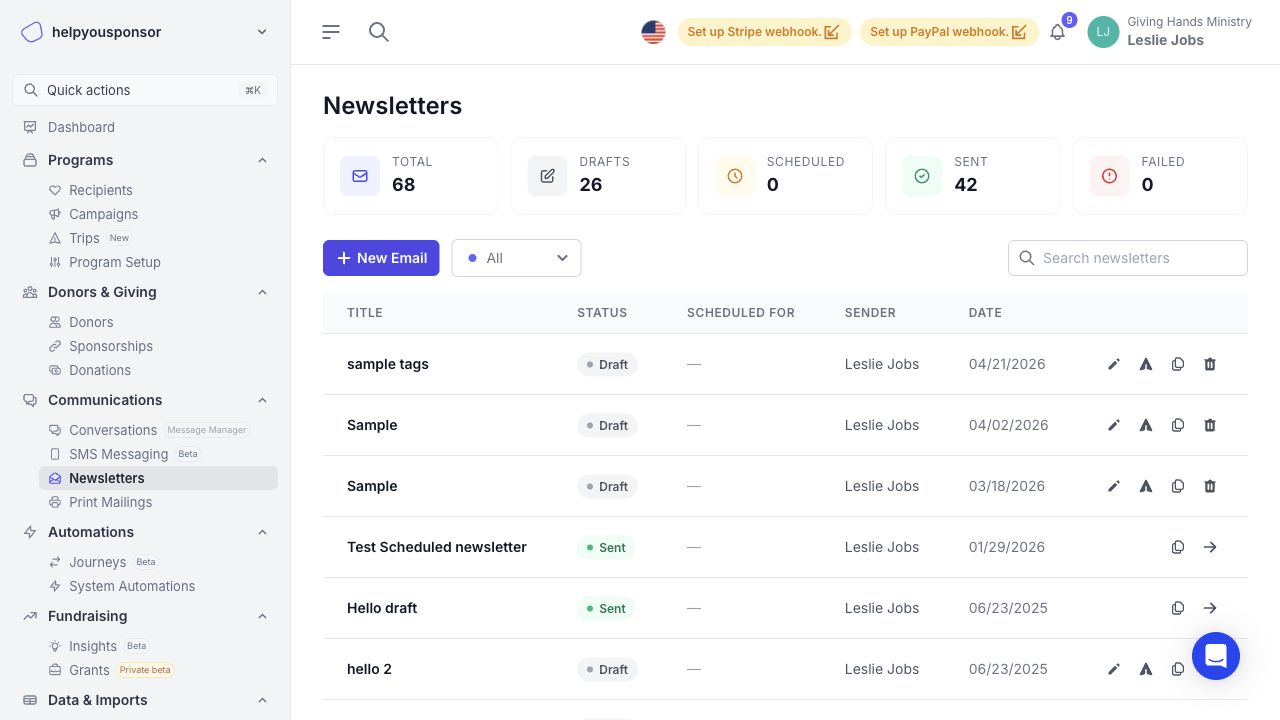
The table shows the following details:
Title: The newsletter title. Click the title to open the newsletter details page.
Status: The current delivery status, such as Draft, Scheduled, Sending, Sent, Partially sent, Delivery unconfirmed, or Failed.
Scheduled For: The scheduled delivery time. This is shown for scheduled newsletters.
Sender: The administrator associated with the newsletter.
Date: The date the newsletter was created.
Manage: The available actions for that newsletter.
You can search newsletters by title and filter the table by status.
The newsletter statuses are:
Draft: The newsletter has been saved and can still be edited, sent, scheduled, cloned, or deleted.
Scheduled: The newsletter is scheduled to send later. It can still be edited or cancelled before it sends.
Sending: The newsletter is being processed for delivery.
Sent: The email service accepted the sends. This does not confirm that every message reached the inbox; provider delivery confirmation appears in Delivery results.
Partially sent: Some sends were accepted, but at least one send failed or could not be confirmed.
Delivery unconfirmed: The sends were accepted, but provider delivery confirmation is not available.
Failed: The newsletter did not finish sending. It can be retried, cloned, or deleted.
Skipped: No recipients were eligible to receive the newsletter.
Note: The Sender column shows the administrator associated with the newsletter. The email address and sender name used for delivery come from your account's Email Settings when configured. If you have verified your sending domain and activated verified sending, new newsletters are delivered through the authenticated sending transport; deactivating verified sending or an unavailable managed transport returns newsletters to the existing delivery path. See Authenticated Sending for details.
Creating a newsletter
To create a new newsletter, click "New Email" above the newsletter table.
Creating a newsletter has three steps: Compose, Recipients, and Preview.
Step one: Compose
In the Compose step, add the newsletter title and build the email body in the editor.
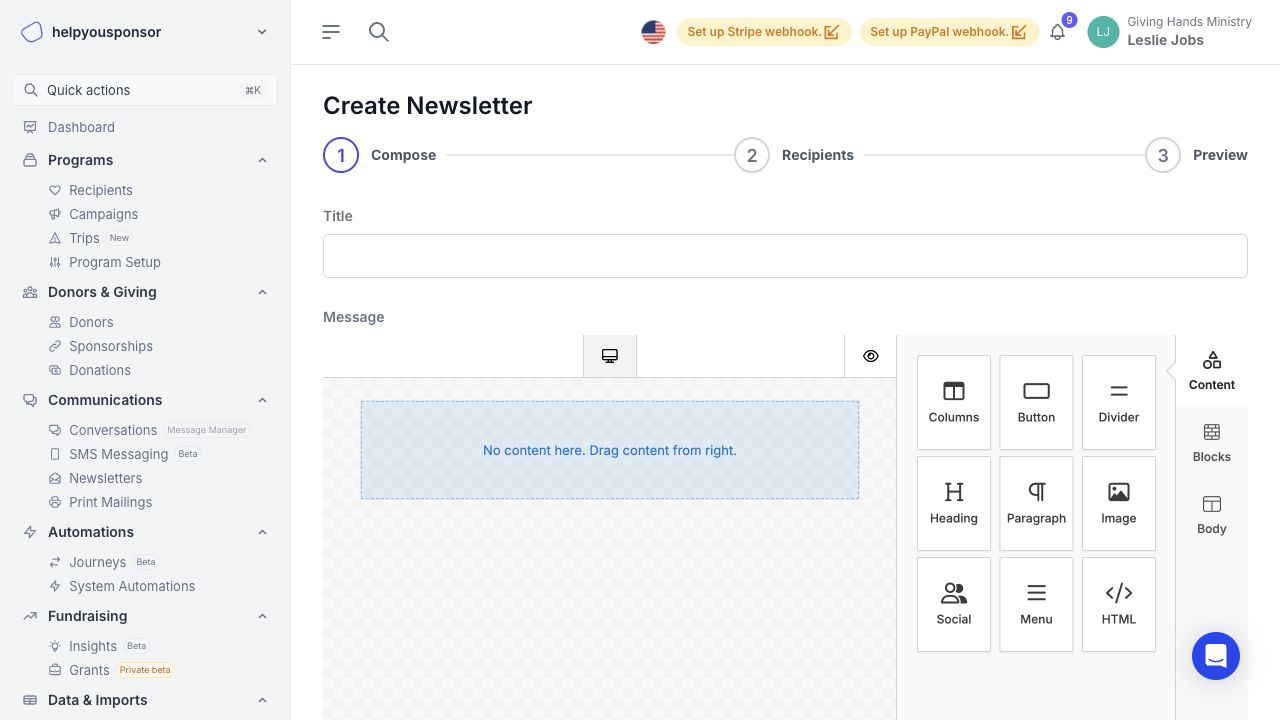
You can also:
Click "Merge Tags Reference" to view available donor merge tags. Click a tag to copy it, then paste it into the editor.
Attach one file to the newsletter. Supported file types include JPEG, PNG, PDF, CSV, Word document, and Word Open XML document files. The maximum upload size is 10 MB.
Click "Save Draft" to save the newsletter and return to the Newsletters page.
Click "Next" to continue to recipient selection.
Note: Merge tags may be unavailable if your account has no donor profile form configured, or if multiple donor profile forms are configured in a way that prevents a single donor merge-tag set from being used.
Step two: Recipients
In the Recipients step, choose which donors should receive the newsletter.
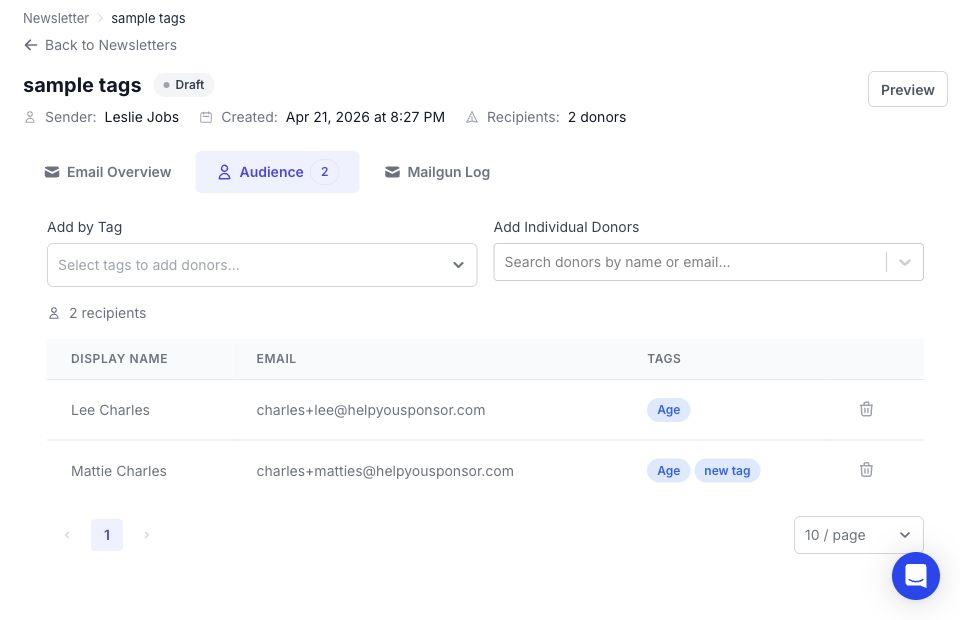
Screenshot placeholder: Newsletter recipients step with Select All Donors, Add by Tag, Add Individual Donors, and selected recipients table
You can build the audience in three ways:
Select All Donors: Select all donors with email addresses. Use "Clear selection" if you want to return to manual selection.
Add by Tag: Select one or more tags to add donors who have those tags.
Add Individual Donors: Search for donors by name or email address and add them one at a time.
Selected recipients appear in a table with display name, email address, and tags. You can search the selected recipients list and remove donors before sending or scheduling the newsletter.
When the audience is ready, click "Preview".
Step three: Preview and delivery
The Preview step shows the newsletter title, body, and attachment preview.
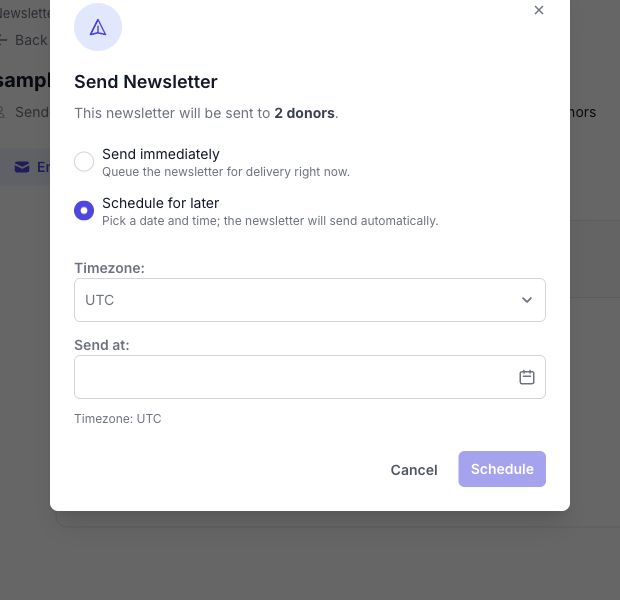
Screenshot placeholder: Delivery options for sending immediately or scheduling for later
Under "Delivery", choose one of the following options:
Send Immediately: Queue the newsletter for delivery right away.
Schedule for Later: Choose a timezone and scheduled time. Scheduled times must be at least 5 minutes in the future.
If you schedule the newsletter, Gratona asks for the timezone and send time before the newsletter is saved as scheduled.
Sending a saved draft
You can send or schedule an existing draft from the Newsletters table or from the newsletter details page.
From the table, click the "Send now" action on a draft newsletter. In the dialog, choose "Send immediately" or "Schedule for later".
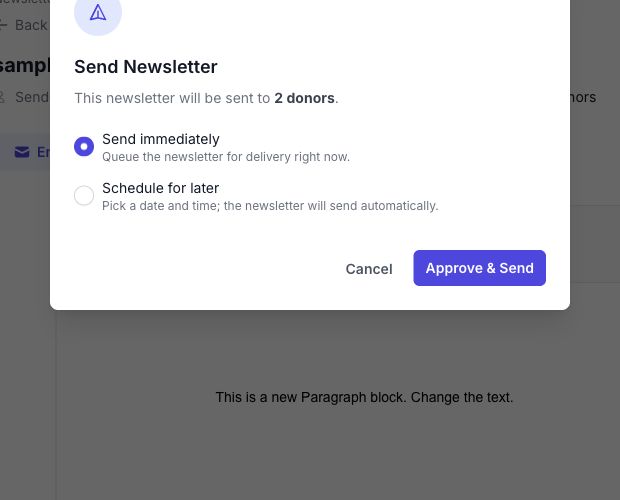
Screenshot placeholder: Send Newsletter dialog with immediate and scheduled delivery options
From the newsletter details page, click "Approve & Send" and choose the delivery option.
Editing newsletters
To edit a draft or scheduled newsletter, click its title in the Newsletters table, then click "Edit" on the details page.
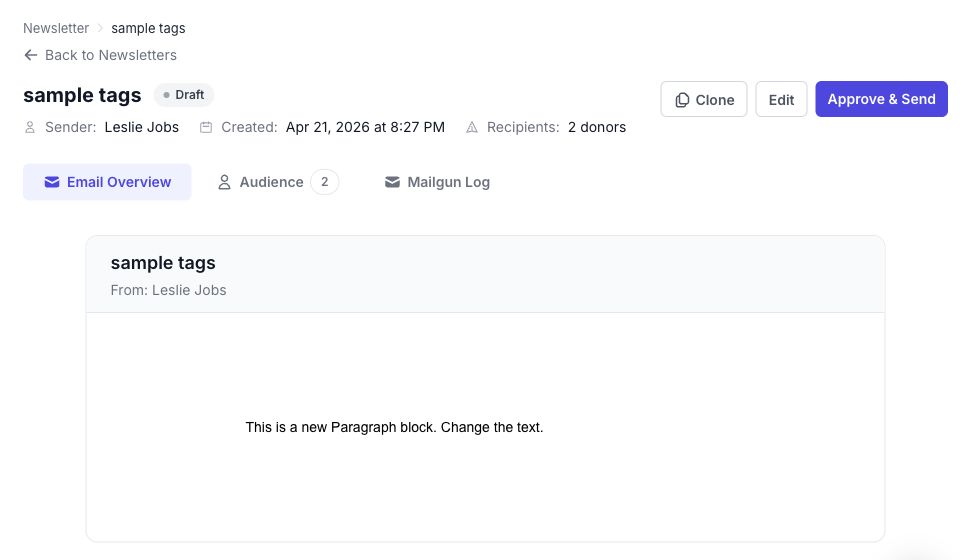
Screenshot placeholder: Newsletter details page with Edit, Approve & Send, Clone, Email Overview, Audience, and Mailgun Log tabs
Draft and scheduled newsletters can be edited before they are sent. You can update the title, message, attachment, and audience. For scheduled newsletters, you can also update the scheduled time and timezone.
The details page includes these tabs:
Email Overview: Preview the newsletter. In edit mode, update the content and attachment.
Audience: Review recipients. For draft and scheduled newsletters, edit the audience by adding donors, adding tags, or removing recipients.
Delivery results (shown as Results on mobile): After a newsletter is sent, this tab shows the send result for each recipient. See Delivery results below.
Mailgun Log: Shows Mailgun event logs when they are available for your account.
Delivery results
Newsletters that are not drafts or scheduled show a Delivery results view with the outcome for each recipient. Viewing it requires the Access newsletters permission.
The table shows these columns:
Recipient: The recipient's name with the email address beneath it.
Send result: Whether the email service accepted the message for that recipient.
Delivery confirmation: The delivery outcome reported by the email provider, when available: Delivered, Not delivered, or Not confirmed. Not confirmed means confirmation was unavailable, not that the recipient did not receive the email.
Details: A plain-language explanation for known problems.
Under "Show recipients", filter the results by All recipients, Sent, Failed, Unconfirmed, Pending, or Skipped. Changing the filter returns you to the first page, and results load 25 recipients at a time. Click "Refresh results" to reload the latest results.
Sent means the email service accepted the message. It does not confirm that the message reached the inbox. Provider confirmation appears separately in the Delivery confirmation column.
For known problems, the Details column explains what happened, such as a rejected sending-account authentication, a rejected sender address, a recipient address that could not receive the message, an attachment that could not be prepared, or sending that was interrupted. Raw provider errors and credentials are not shown.
Some sends are unconfirmed. Those recipients may have received the email. Contact support before retrying them to avoid duplicates.
Cancelling or retrying delivery
Scheduled newsletters can be cancelled before they are sent. Click the "Cancel schedule" action in the Newsletters table. The newsletter returns to Draft status.
Failed newsletters can be retried from the Newsletters table. The retry action depends on whether delivery results were recorded for the original send:
Retry failed recipients: When delivery results are recorded, this action sends the newsletter again only to recipients with known failures. Sent and unconfirmed recipients are not sent another copy.
Retry newsletter: When recipient delivery records are unavailable, this action sends the newsletter again to the full audience count shown in the dialog, and the dialog warns you to check earlier delivery with support to avoid duplicates.
While a retry is running, the newsletter shows as Sending until the recipient results are updated.
Cloning a newsletter
You can clone a newsletter from the Newsletters table or from the newsletter details page. Cloning always creates a new draft so you can review it before sending.
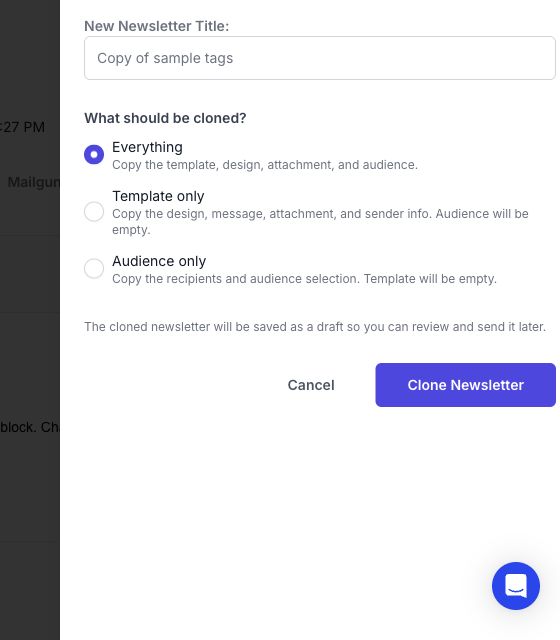
Screenshot placeholder: Clone Newsletter drawer with title field and clone scope options
When cloning, choose what to copy:
Everything: Copies the template, design, attachment, and audience.
Template only: Copies the design, message, attachment, and sender information. The audience is empty.
Audience only: Copies the recipients and audience selection. The message template is empty.
After the newsletter is cloned, Gratona opens the new draft so you can edit, send, or schedule it.